Showing posts with label Holidays - Valentine's Day. Show all posts

10 February 2012


Crafter-mornings!   I am doing a quck post tonight before heading to bed....read on about my adventure crafting with some fab girls!  I'll follow up with that tomorrow once I get my zzzzzz's in, LOL! 
UPDATE:  I wanted to express my thanks to Amy who allowed me to come 
to craft with a group of beautiful young Moms at a local YWCA center! 
It was a total kick and I now remember why I feel tired - I'm so older now, lol!!! 

Anyways they were adorable and great to see people try new things! Thanks to the girls!!


1.

2.
1. Letter Templates cut out and glued to card base. 2. Now dressed up and what a lovely difference!

This project can be found at Splitcoaststampers under ' WORD CARD ' 


Leave a space to tuck a precious photo!


....or a symbol of LOVE! 


8 February 2012

Black Valentine - why not?

I was given a challenge by someone to create a ' black ' card of substantial size!


I chose to design it by working the opposite of symmetrical and that has led me to this card!  


Layering lots of scalloped circles topped with a 'Love Bird' 


CLICK ON PHOTOS

Here is where I chose NOT to follow a predictable pattern!  
The tiny flowers has one that sits in a place of its own while colours change eradically ending with 2 in sparkly black HEARTS!   Even the way I positioned the ribbon is 'off'....the point of this card is to think differently about composition while balancing the parts into one pretty effect! 


I used our HELLO FRIEND Stamp Set and our HEAT'n' SET to 
add SILVER GLITTER.  Heat 'n' Set allows you to stamp the image and then you 
heat the spot up to get it all "gooey" - then toss on your glitter!  Voila!
But its a delicate matter - so allow it to dry before brushing off the excess - or be very
careful to tap off the excess glitter - you know what I mean?  Hey, we all go 
through the glitter learning curve, lol! 

Well I LOVE IT - hope you think of trying an edgier colour for VALENTINE'S CARDS! 

YOURS TRULY
TAYLOR

oxox

19 January 2012

VALENTINES - Its Countdown Time!

Crafternoons!


I haven't thought much lately, yes my secret is out - I'm on a sort of 'post holiday automatic pilot'  if you will. So thoughts turning to Valentines hasn't 'gelled' in   my head until really recently!  


My birthday is also February - whoo, double fun!   But let's get thinking back to Valentine's!


GREAT MINI VALENTINE PROJECT


For the MOMS out there with children in junior school - or for the CONSIDERATE STAFF PERSON who likes to brighten up the mood at work...for the CLUB LEADERS who tirelessly devote your time ...anyone who has a group to consider at Valentines - THIS IS FOR YOU!!!!


It's EASY - MULTIPLE FUN too!   You could do this while watching TV. OK - HERE IT IS!


*It's a TREAT CUP VALENTINE !   
How Cute is this! 

Gather your candy - and here is the Stampin' Up! products you'll need:

Cardstock - Melon Mambo 
Patterns Designer Series Paper Pack - Brights
Stamp - SWEET CENTERS Item #116521 
Ink - Melon Mambo
Punch - 1-3/4 Circle Punch
Other - Circle Treat Cups
Adhesive

The SWEET CENTER Stamp Set is a cool one to own. 
Designed to work with the TREAT CUPS - the Circle one in particular. 

SWEET CENTERS
It's priced at $36.95 woodmount and its value is in all the holidays it will help you with!  There is BIRTHDAYS, HOLIDAYS, HALLOWEEN, and SUMMER BLOOMS too! 
Tip: use the flower petals and a treat cup to hold some flower seeds for your fav gardener! 


As well, the same idea can be extended to our HEART SHAPE TREAT CUPS if you'd like
with the stamp set " SWEETHEART " [#120415 wood/ or 120780 clear ] or do a set of CARDS like these:


SWEETHEART STAMP SET

Self-Adhesive  TREAT CUPS - shown in HEARTS

There is also a co-ordinating PADDED ENVELOPE!  That I think is good-thinking! 


Hope you get started on your Valentines - especially if you have a large group!  
Get going! CONTACT ME if you'd like some help! 
Better yet - have a VALENTINE'S PARTY and earn some FREE SALE-A-BRATION beautiful products
while you are at it!!!  I'll bring cupcakes, lol!  

Oh, by the way....
 I'd have more to of those Mini VALENTINE Treats to show you but we ate them, lol! *

12 February 2011

Valentine Card - doesn't have to be PiNk!

No, no, no....it doesn't!

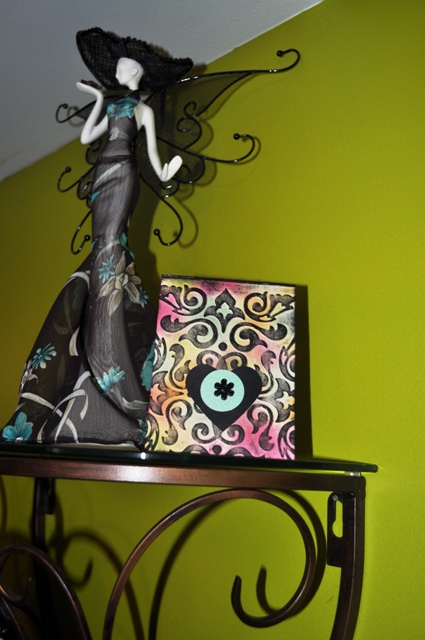
It's all about your own style - and here is one I made while experimenting with a technique.

I wanted to a) emboss and b) colour with embossed surfaces.

So I chose to:
1) ink my VERY VANILLA cardstock with all sorts of ink colours using SPONGES.
2)then I EMBOSSED my coloured and cut 4-1/4x5 inch rectangle cardstock using an EMBOSSING FOLDER where I sandwiched the cardstock and pressed it through my BIG SHOT DIE-CUTTING and EMBOSSING MACHINE.
3) now I used a separate sponge to ink over the entire piece with BLACK ink - quickly and lightly!  This colours the "raised surface" created by the embossing folder.  To get a more precise ink effect, I could of used my brayer tool.

Now, I punched out a black HEART with my Heart PUNCH, and a blue circle with my 1 inch CIRCLE punch and attached them with a black flower BRAD.


Chipboard Accent Update - My Daughter Made a Valentine!

However amazing on her part....its not for me!  I'd like to see the results of a poll of crafters who have kin living with them, children no less...who will not craft much!  Honestly, she will on occasion - but ironically, I can not expect a card - she tells me she does 3 per year, that's her limit! LOL!

But - if not for Mom, then she doesn't mind to hit my craft studio and go crazy. And when she does, I love her style!

Here is my chipboard accent (please see Feb 3rd post).....on a card she made for a friend!


My daughter's card she made as a Valentine for a friend. 

Told ya she was talented, oxox! 

Supplies: Stampin' Up! Basic Grey Pattern Paper(striped, dots), Rose Red and Pretty in Pink (2nd layer and inside) cardstock, Vellum specialty paper,  Love You Much stamp (heart), Heart Punch, XL Flower Punch (inside grey flower).  Misc:  Heart Border Punch (Fiskars), pale pink ribbon. 

My Valentine's Banner

Here is the reveal of my Sneek Peek!

I have to say the pictures do not really give the true colours very well, my camera "reads" the green background too much and so I did my best - just bear in mind, it looks prettier in person!

But here it is....my labour of LOVE literally this past few weeks!  I did it in bits and bobs because it was just one of those projects that require your thinking beyond the norm, I usually do cards, LO's - but this was more of a collaborative - evolving - process.  I may have over-embellished, but that tends to be my style - you could do this much more simplier!

Used the TOP NOTE DIE by Sizzix and sold by STAMPIN' UP! - as I am sure many of you recoginze.  The only other thing I can say perhaps, is that the middle piece (which serves to separate the two words, Love, You) has a heart shaped frame that is made of 2 SCALLOP FRAME die pieces - also SU! dies.


Here it is in full length on my living room wall - sorry, this is a dreadful pic in terms of colour, see how the camera  reads my green walls too much - and I had to tone it down. Sorry! Maybe I need a few lessons!

But hopefully, you can see how it takes up a certain amount of space, so it could be used for an anniversary, welcome back, congratulations, new baby, birthday...all sorts of occasions, and look substantial!

It could be draped across the front of a banquet table - over a door - fireplace, lots of places!


Here is the two sections...


...LOVE...


...YOU...


 ...Here is the TOP NOTE DIE CUT (red) I used for all the letters. 
Then I layered a background paper (striped pink/vanilla) and topped it with 
a LETTER DIE CUT from my ALPHABET DIES.  
The a few of them I added extra 'embellishments' like the embossed medallion and the accordian folded circle with a small glittery paper heart.  


IMPORTANT STEP !!!

TO STRING THE FRAMES SO THEY STAY IN PLACE....
you must "KNOT" them into place.  Otherwise, they slide on the string. 
I made holes in each frame, and strung the string once through the hole - then through a bead - then back through the hole, and tightened.  That creates a "stop" .  You could make a knot if you want to like I did on the heart piece, but I found it wasn't necessary. 
I also drew a small line on a scrap of paper, and used that to measure the spaces between each and every
piece, so there was some consistency.  It is a little tedious - do this on a good day, or have a few breaks like I did. Otherwise you might go "knotty"  :)

To add VISUAL INTEREST I added a metal HEART I found at the Dollar Store between each of 
the frames,  its a cool embellishment I thought - for a dollar! Yess-um!


....the middle section...the scallop frames (see white one is the scallop frame) and take 2 of them
to create a background to the  floating piece in front!  Who knew!


There was a lot of folding going on - lol - and I am not the best at it!  But I love the look the accordian folds give to an embellishment!   I used up lots of scrap papers too - another bonus ...and fun because its like 'pickin' through your stash boxes' to see what will work with what - and that, is what craftin' is like!

HAVE A HAPPY VALENTINES DAY!


28 January 2011

Love You Much Valentine Card

Hello Crafting Friends!

I do not have my newest order yet, so I had to dig around for Valentine themed stamps from my current collection.....which is just fine because when we buy stamps, they should take us from year to year, time after time.

LOVE YOU MUCH is a recognizable and popular stamp set from STAMPIN' UP! and is in our current catalogue.  However I used just one stamp for this card - the love birds, and I just luv em!  They are the cutest couple!
Together with a Bigz die, the Scalloped Circle and our Circle Scissors Plus tool, I made my card. Inks, marker, chalks...the ol' favourites are all here.

I also employed a new tool - a lid!  Ha ha - that's right, a highly technical tool!

Here is what I did.......

I layered some paper onto whisper white cardstock - by turning the paper clockwise til one end juts above the fold line, trimming the edges. I am keeping the cut off corners to see if I want to do something with them...perhaps layer them on the corners? Or maybe not ;)

I cut Pretty in Pink cardstock with the Scallop Circle die in my Big Shot machine, I also 
cut a 3-3/4 inch circle with the Circle Scissors Plus tool on the glass mat. 
I stamped the birds using Basic Black ink and then using a LID, I traced the edge of the lid to create 
a telephone line - or a clothing line right at the birds feet....trace edge to edge! 

The birds are coloured with markers (Pretty in Pink) and chalk (Bashful Blue) and 
the heart is stamped in Rose Red.  The heart stamp with the flourish came from TINY TAGS stamp set. 
The black FLOWER BRAD is from our Naturals Flower Brads collection. 
I think the black colour helps to make the other colours stand out! 

Stamped "love" from TINY TAGS as well.
Mount the Scallop Circle Love Birds to the card base 
slightly off the top edge, secure with the brads. 

Add a black, sheer ribbon and tie. 
Center the bow...or off to the side! 


Aww....


22 January 2011

A Tour of some "Super-Star" Valentine's Projects by various SU! Talent!

HI....fellow crafters!

I am sick - just the bad headache and stuffed up head kinda sick, but its putting a curve ball to my major cleaning and crafting.

Soooooo....I thought I would take a detour from crafting myself and see what others are up to - and WOW there are such great ideas out there, huh?  Collectively we are all awesome!!!!

So here is what I have found so far......I'll add to it as I go along till I'm better - enjoy!

Stampin' Up! Stars

What comes in small packages?  Check these out.....
1.).the first is a super-cute project from LeeAnn Gref and her blog Flowerbug's Inkspot and its her Valentine's Dresser........how cute is this!  It features the Matchbox Bigz XL Die, a few punches and our latest Love Letter DSP, glimmer brads and the lovely red glitter cardstock.  Very nicely done!

LeeAnn tucked some treats and 'love'ly coupons in order to pamper her husband!  Awesome idea for anyone on your list...your MOM, children,.a BFF, or to keep your neighbour on your good side...bribe them with a few favours!  LOL!


2.

HERE is another sweet 'box' project.  Tammy Howell from her blog, Tarheel Stamper. By using a papermache box and our Daisies #2 Bigz Die, she has created her Valentine Heart Box - and I love the crimped collar around the top's side....sweet!  


The Daisy die has 3 sizes of the flower - which is how Tammy made such a lush-looking daisy! What a cute button too!  


Alright I wanted to showcase a card, but then I found THIS NEXT IDEA....!!!
Our STAMPIN' UP! brads, buttons, small embellishments usually come in small round  translucent containers, right?  Right - and this talented SU! Demonstrator has discovered  that 'another' person dressed up these containers - so she 'cased' the idea and came up with these.....!!!  Aren't they worth the love that goes into making them?  

Catherine Cote featured project on her blog, CeeCee's Creations.....last year, but they're well worth repeating......

....awwwh, how cute!   
Another one below....


Well that's it today - I promise to dig up some card and scrapbooking ideas! 

 I'm off to rest - how do you do one of those 'sleeping faces' ...++ 0  [I don't think so, lol!]


19 January 2011

Valentines Heart Punch Card and Busy Patterns Technique

Helloooo.....been such a long time between posts as I am in the throes of "re-organizing"!   Gosh where does all the stuff that clutters every spot come from? Anyways - I think its a good idea to use January as 'the' month to de-clutter esp. here in the wintery North.  Not much fun outside anyways, right?

But there is fun in our craft corners - and I tried a little technique with this card, so I'm here to share!

 I received a card in the summer which embodied a colourful personality - and it really made me feel great, all sun-shiny and happy!

Upon close inspection, the card involved no less than 3 patterns of cardstock. Very busy and different patterns!  Layered together as a "strip" or band against a soothing backdrop of a solid colour. The focal point - a 3D flower sat on top, slightly off-center. And all made sense together! WONDERFUL!

So: busy patterns layered together, soothing backdrop and a dimensional focal point! Voila!

Now I tried it, here it is - my Valentine's Card for a friend ( can't say who cuz they haven't received it yet!)


Colourful Patterned Band
As you can see, I made my strip from 3 patterns!  I chose the patterns from a co-ordinating collection, but as long as they share something in common in colours, you should be good!  

Combining Patterns is easy if you follow a few guidelines:
      - try 3 similar patterns - for example, all florals or all dots; 
      - or a 'combo' of one or two similar motifs (ex: flowers) with a graphic element (i.e. plaid); 
      - vary the sizes (tiny print, medium print and large print),

....I used a large plaid, with 2 floral motifs [ one a small print and the other a mostly larger print].  But they all shared  similar colours!  

Soothing Backdrop
My background is a soft pink framed with a bit of vanilla - and I have added texture {Stampin' Up's Elegant Bouquet Embossing Folder] by running the cardstock through my Big Shot - but over-all, its pretty much a large dose of a soothing backdrop to support the busier elements in front. 

Focal Point
I punched out 3 hearts in a glittered cardstock - and embellished them with buttons.  I love adding buttons - for such a small investment, they add a lot of 'punch' - lol! 


One problem emerged - my card was 'front heavy' and in danger of falling forward on its face!  To counter-balance this, I added a layer of cardstock to the back as well, and an embellishment. This weighed the problem out, as you can see here....

back of card

So there you have it - I think it turned out swell and the reaction from my daughter was great when she saw it! Unfortunately the picture doesn't do justice to the lovely colours - but I believed I achieved that zipitty-do-dah look I was after!   

TRY IT YOURSELF - its great to use up lovely bits of left-over cardstock! 

Thanks for swinging by!

STAMPIN' UP! SUPPLIES -  Heart Punch, cardstock in 'Pretty in Pink', Textured Embossing Folder 'Elegant Bouquet', 'Rose Red' Classic Ink Pad & Marker, sponge. 


14 February 2010

HAPPY VALENTINE'S DAY TO ALL YOU HAPPY SCRAPPERS!

...OR NOT - Happy Valentine's to anyone visiiting today!  Hope you are having a lovely day! 

WE are quietly enjoying 'normal' as a week of mid-term mania and illness has passed - and I finished one huge important task, so laid-back normal is kinda good!  I am going to make my famous brownies soon and then a nice chicken dinner after we play some monopoly and then a trip to the treadmill later on just to even things out a bit - :)

Did we make each other Valentine cards?  No. Is that kinda queer in a house full of card supplies? Probably 'yes'.  But I have been more focused on some scrapbooking, and just exploring some of my new goodies and I have something I'd love to share with you...remember the teaser in the previous post?  Well, heeeere it is!  It's Alex's first baby photo!  Hurray - I say that because its been in storage for 22 years!!!  Ain't that something?  SO any photo came come out to say 'hello' any ol' time as you can see here!


Let 'er rip! Stamping
First things first - I made the pages earlier before I knew I'd pair it with this photo I just grabbed some VERY VANILLA cardstock to begin the process.  And look, the previous post makes my point - take some stamps and just let loose!  That's all I did!  There was no plan at all - it was what we call in artisitic terms 'a very organic experience' .

 I used different stamps from different sets, and combined colours I thought would go well together, but there was NO DIRECTION until I stamped the letters - then all I did was aim for a 'fairly' straight line but even then, a little un-eveness looks great.  When I was done, I had two pages, the first one shown here is using our alphabet stamp set Lovely Letters - and for some reason unfathomable to me now, I made an 'W' on the end of "SWEET"...??? Who knows what brilliant idea I had at the time, but I made 'sweet history' of it by covering the odd W with a punched out heart ( Heart Punch) and problem solved.


And on the other page I left a lot of room for my journalling.  I don't always know what I am doing with these pages if I design them first without photos, so it only makes sense to leave at least one area bare. Its easier to go back and add more later if you want to. I also ripped the top of the page off, and added another 'ripped' strip of PRETTY IN PINK cardstock - and it works on both front and back of the page, that's the beauty of un-even edges, or tearing techniques! :) {showing 'backside'}

 In the end, I loved both pages!

Now it was time to find some photo worthy of my pages - and looking to my baby albums, I found our first photo of baby Alex, you know, the one they take at the hospital. Our hospital is gone now, made way for a new health center, so I guess it has more significance.  Anyways, we had a near disastrous delivery and our  poor baby was delivered dramatically and as a result was paralyzed down one side, and I never held her right away because a team of 4 came bursting through, grabbed her and whisked her away - and thankfully solved the paralyzation problem. But the poor pumpkin had a fractured shoulder and collarbone and a sore head I image from the forceps used to deliver her last minute , which is why she doesn't sit up straight and look too happy. But she was a trooper and we were even more blessed after such a difficult delivery to have her healthy after all. So this photo goes in the album with pride!


PAGE ACCENTS

I used our Heart Punch a lot to make accents, especially for tumbling some hearts together in a stack!  i only glued the pointed tips of the hearts making a place to tuck the next heart or other item like a note, in the top part - treat it like a "pocket".

Eventually I will be making  more journalling but I decided to start with her birth announcement information, and used my own hand and tried to imitate the scrolled letters in the word, Wonderful, as my inspiration. You only have to try - not be exact - and the results will be pretty good! 

TIP - for preservation methods - write in pencil. I  then "copy over the pencil " in whatever medium I like, here I used a journalling pen in pink ink overtop of the pencil. Reason is that pencil will remain for ever - whereas every pen ink we generally have access to - even 'permanent' inks - fade. They might remain but look yellow over time but pencil endurs. That is why I use it as a "base" for more decorative treatment.  Trust me - as a former Art Conservator, I used to run experiments testing for the fastness or stability of black pens on the market, ones even marked 'Archival' - and through means of speeding up the results, they all altered their appearance. OK, enough of that!

I made a small accent using our Stampin' Up! product 'Build-A-Brad' ....see the small word "My", and then I added lovely grosgrain ribbon in pink/white stripe to really emphasize the photo. Another tie in with that is added under one of the journalling lines. Just a tad bit of ribbon, no biggy, but it is enough to add some ooomph! I used ordianry cross-stitch floss. 


I measured the folds into a pattern - make your own pattern, it all works. If you want to crease the edges with an iron while working, or tack the pattern in place with pins - go for it. I used my bone folder, and some of the floss to tack the ribbon in the back before adding a small tie in the front of each folded 'bow' .  This is the only bit of aggravating piece of work - but its nice to do, and you will be glad you did!!!

So finally - its done and in its new home in my new red linen album!


Thanks for joining in!
Cheers,
Beverly

* all materials Stampin' Up!


4 July 2009

Celebrating Life, Simple to Exotic Cards and Notecards ....


I have been toodling around today with the theme of celebrating Life and lovely notes to send to friends. Its always delightful to receive mail no matter how much email one resorts to! So here they are......

...my inspiration is the first card shown: a 'folded' card I saw on SplitCoastStampers (SCS) by talented card artist named Beate Johns. The card was just wonderful - and I wanted to try my hand at.....hers is much fancier but mine is not too bad I think...to me it has a bohemian quality - all I did was find colours and patterns I could swizzle together - I may even add some pearls later! Aaaah, my photos are not the best - sorry but I think my camera is "slowing" down! {it's not me!}.

Our heart stamps are different, but that doesn't matter - one does with what one has :) I stamped my heart in Versamark and then coated it with glitter. Oh, and I inked the paper with some soft pink before stamping the heart image in a darker ink. One could just go on and on with this card!
Wouldn't this card be a fun one to receive - can't you just see making an unusual custom envelope - thin and long? When they open it - out it folds!
Cheers!

Template by: