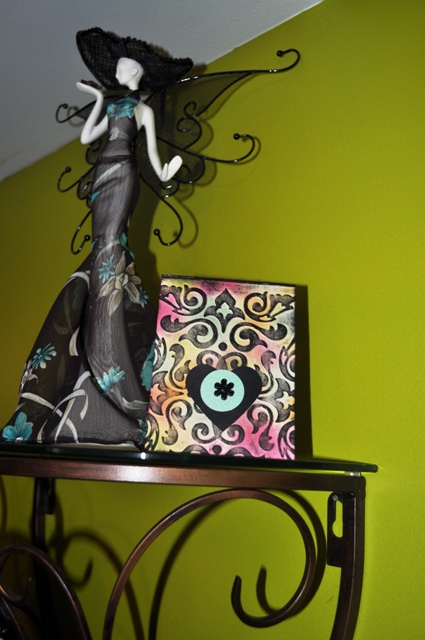
Showing posts with label DIE-CUTTING PUNCHES. Show all posts

11 December 2012

Hostess Christmas Gift Tags - an Easy Project!

Hey-Ho-Ho....
Often wonder what to give as a small token of your appreciation ....and at this busy time of the holidays?

Look no further than the ever-useful GIFT TAGS!

They may be the 'small touches in life' but as hand-made gifts - they are perfect for saving your friend time and money!

Recently I had such an opportunity to give a lovely person a wee gift - a Mom - who gave a group of young teens a very nice afternoon of crafting and lunch.  To offer up a note of appreciation I used the following:


  1. Stampin' Up! Tag and Curly Label Punches 
  2. Stampin' Up! small size stamps - from A Cute Christmas {retired}
  3. Stampin' Up! Real Red / Whisper White / Marina Mist Cardstock
  4. Stampin' Up! Markers {various}
  5. Stampin' Up! Espresso Bakers Twine
  6. Stampin' Up! Dazzling Details 
  7. and the ever useful sparkly shreds!  whoooo! 
  I thought a group of 6 tags was a nice set - but you stamp and colour away onto white cardstock  as many heart-warming scenes as your heart desires!  I love snowmen and the stack of gifts were real fun to colour - then its a glob of Dazzling Details on each - let dry then its time to package them together! 

Here they are getting their colours on!  


String em up together!

Let's bag them with good ol' sparkly shreds and a plain bag... 


and finally pop them in, staple a folded 'topper' on and voila...!

HOSTESS GIFT TAGS


 * So hope you have a special Hostess in mind! *

No Peeking Children's Handmade Christmas Card

Here is a really cute stamp set from Stampin' Up! called
 "No Peeking"! 
Here is the card I made with this set at Maria's stamp event in November...


Very sweet isn't it?  And I like the style of the greeting - so I think a child would LOVE a card like this!
But after searching the internet, I could see that crafters are having a field day with this stamp set - there were so many great projects out there - whew! Fabby stuff!
Here's a few that grabbed me from talented Stampin' Up Demos like

Click on their names to visit their respective blogs!

...tags galore!!! Excellent!

...just awwww! 


...great for twins!

... love the colours and layout!

This is what I luv-luv to see with a stamp set - real versatility and imaginative possibilities! 

Stampin' Up! No Peeking Stamp Set
wood mount #126290 $29.95 CDN
clear mount # 126292 $21.95 CDN

Now GO craft!  
*
  

21 May 2012

The Best Gift is to Give Part of Your Self

......and that is the powerful little sentiment on these two cards made for my Dentist and her assistant!  They both speak Spanish and since I had this one stamp " el mejor regalo es dar una parte de ti mismo " I couldn't resist using it to adorn the cards!   


Introducing MY DENTIST


I must say that my dentist and her staff are amazing!  They treat you with such kindness, you have no idea!  Both my daughter and I are nervous when it comes to dental procedures, but through their care, I am coming around to being a much more comfortable patient.  


If you are near our area, you might want to see Dr. Rodriquez here BELLESMERE DENTAL CLINIC - as you can see they have more than just me as happy patients!  


THE CARDS


I wanted SIMPLE and SUNNY - and I think I pulled that off! 
These cards are under 5 minutes to make each - and the fact that they
will belong soon to two people who share something similar in their lives meant
I wanted to make each one an individual effort, and yet, retain something in common - an
easy breezy style!  And colour - lushious colour!   


Check out this flower!  Dimension is good, very good for a card - or any project!  Colour combinations 
are fun - like picking our your outfit for the day!!!   Then you can combine layers of printed patterns when 
the colours are paired nicely.....my Concord Crush and Poppy colours are also
lightened with the addition of the white paper.  Add another burst of colour
with the brad - and presto, you've got a fantastic flower! 

Unfortunately, this is one of the dies in our Retiring List which is currently running
through Stampin' Up! transition to our NEW CATALOGUE due out June !. 
So if you want this die for the Big Shot -contact me :) 


On this card - I treated the TOP a little differently!   Its created with one of our newest dies - Adorning Accents, and a simple little step like this helps you to create interesting style.....its easy smeasy!!!

And this flower is one of our current Punches and the scalloped border was created with one of our most recent additions to the Stampin' Up family!  The paper and ribbons shown here
today are retiring {the green retired awhile ago - but is similar to another 
current colour}.....but I've always got a 'stash', lol! 


Combine your greeting with sweet styled die-cut borders....


...or for something different, turned sideways!  Here it is paired with the strip
of co-ordinating designer floral paper {polka dot Poppy paper is a separate sheet}.

I love trying to make something regular become a little irregular!  Try it! 

And don't forget your dentist - they're helpin' you keep a good-looking smile {ting!}

CHEERS

8 February 2012

Black Valentine - why not?

I was given a challenge by someone to create a ' black ' card of substantial size!


I chose to design it by working the opposite of symmetrical and that has led me to this card!  


Layering lots of scalloped circles topped with a 'Love Bird' 


CLICK ON PHOTOS

Here is where I chose NOT to follow a predictable pattern!  
The tiny flowers has one that sits in a place of its own while colours change eradically ending with 2 in sparkly black HEARTS!   Even the way I positioned the ribbon is 'off'....the point of this card is to think differently about composition while balancing the parts into one pretty effect! 


I used our HELLO FRIEND Stamp Set and our HEAT'n' SET to 
add SILVER GLITTER.  Heat 'n' Set allows you to stamp the image and then you 
heat the spot up to get it all "gooey" - then toss on your glitter!  Voila!
But its a delicate matter - so allow it to dry before brushing off the excess - or be very
careful to tap off the excess glitter - you know what I mean?  Hey, we all go 
through the glitter learning curve, lol! 

Well I LOVE IT - hope you think of trying an edgier colour for VALENTINE'S CARDS! 

YOURS TRULY
TAYLOR

oxox

28 November 2011

MERRY CHRISTMAS BOUQUET - Beautiful !

One of our perks as Demos is to receive inspiration from a monthly magazine Stampin' Success which contains awesome projects like this gorgeous PAPER FLORAL BOUQUET in a BOX!!!  

YOU CAN MAKE THIS TOO!

Yes, seriously, you can!  I can!  We all can!
Purchase the list of products and you could make this in time to present to so many awesome people in your life - and ...
it's never gonna fade away! 
ok only if they leave it in a window forever, lol! ...but this is a beautiful reminder of your affection and its a real conversation piece, so your intended will enjoy relating to others how you made it which will bring more joy to them...
so it keeps on giving! 

GET STARTED! Hopefully you have some items in your possession or can borrow some BUT order supplies today and you will have many projects waiting for you to create! Let's Go!
Stamps
Christmas Greetings Set, Gifts of Christmas SetPaper - Cardstock
Garden Green, Old Olive, Real Red, Soft  Suede and Whisper White

Ink
Classic Stampin' Pads: Old Olive, Real Red;  and Early Espresso Stampin' Write Marker; and Stampin' Pastels

Accessories & Tools
Real Red 1/4" Grosgrain Ribbon, Linen Thread, Rhinestone Basic Jewels
Stampin' Dimensionals, Color Spritzer Tool, 

PUNCHES: Boho Blossoms, Dotted Scallop Ribbon, Extra-Large Tag and
Lace Ribbon, 1-1/4" Circle, Itty Bitty Shapes Punch Pack
BIG SHOT and DIES: Flower, Daisies #2 Bigz Die, Island Floral Bigz Die
Sponge Daubers
Floral wire
Hot glue gun
Pinecones
Silver ornaments

Instructions
To decorate box: 
  1. Punch border from Whisper White Card Stock using Lace Ribbon Punch and adhere to box. Wrap Real Red 1/4" Grosgrain Ribbon around box and adhere. Wrap Linen Thread around box and adhere.
  2. Stamp flower image in Old Olive ink on Whisper White Card Stock. Stamp sentiment over flower in Real Red ink. Punch tag from stamped card stock using Extra-Large Tag Punch.
  3. Adhere tag to Old Olive Card Stock and cut out.
  4. Punch border from Real Red Card Stock using Dotted Scallop Ribbon Punch. Trim scallop border and adhere to tag. Adhere Rhinestone Basic Jewels to tag.
  5. Tie Linen Thread in a bow and adhere to tag.
  6. Punch flower from Real Red Card Stock using Itty Bitty Shapes Punch Pack. Adhere rhinestone to flower and adhere to tag. Adhere tag to box using Stampin' Dimensionals.
To create Whisper White flowers
  1. Cut flower petals from Whisper White Card Stock using Big Shot and Island Floral Bigz Die. Layer two sets of petals. Sponge Stampin' Pastels on flower center using Sponge Daubers.
  2. Spritz flower using Color Spritzer Tool and Early Espresso Stampin' Write Marker.
  3. Cut strip of Whisper White Card Stock. Snip card stock every 1/16" and roll into a cylinder. Sponge Stampin' Pastels on snipped card stock. Adhere to center of flower, standing straight up.
  4. Attach flower to floral wire.
To create Real Red/Soft Suede flowers
  1. Cut several layers of flowers from Real Red Card Stock using Big Shot and Flower, Daisies #2 Bigz Die.
  2. Punch a circle from Real Red Card Stock using 1-1/4" Circle Punch. Adhere circle over hole in one flower. Lay flower flat.
  3. Curl petals on remaining flowers and fold in half. Adhere folded flowers around center of flat flower, slightly overlapping. 
  4. Snip Soft Suede Card Stock every 1/16" and roll into a cylinder. Adhere to center of Real Red flower.
  5. Attach flower to floral wire.
To create Old Olive/Whisper White flowers
  1. Cut flowers from Old Olive Card Stock using Big Shot and Island Floral Bigz Die. Cut one petal from smallest flower and fold the rest of the flower to three petals.
  2. Punch flower from Whisper White Card Stock using Boho Blossoms Punch. Scrunch flower and adhere to center of Old Olive flower.
  3. Attach flower to floral wire.
To create Real Red flowers
  1. Cut flowers from Real Red Card Stock using Big Shot and Island Floral Bigz Die. Layer flowers, removing petals from some layers. Curl petals downward.
  2. Fold and distress small piece of card stock and adhere to center of flower.
  3. Attach flower to floral wire.
Additional pieces
  1. Cut thin strips of Garden Green Card Stock and attach to floral wire.
  2. Attach ornaments to floral wire.
  3. Attach pinecones to floral wire.
  4. Arrange flowers and additional pieces in floral arrangement.
IF YOU REQUIRE ANY HELP - ANY AT ALL - PLEASE CONTACT ME!
NOT EVERYTHING IS EASY TO UNDERSTAND ESPECIALLY IF YOU ARE NEW TO THIS HOBBY - AND WE LOVE TO SHARE, SO PLEASE ASK ANYTHING!!!

IF YOU NEED TO PURCHASE SUPPLIES - PLEASE CONTACT ME AS i AM ONLY TOO HAPPY TO HELP!  

THANKS EVERYONE!!!!

23 November 2011

Holiday Card Ideas

Hello! *

I am continuing my trip through my archives today!  I now have a hurt right hand to add to my lost camera cord as another reason why I can't post new projects - I can't "make" any - honestly, some weeks!

So I found these two favourites using our ORNAMENT and SCALLOPED OVAL PUNCHES!
I remember the favourable results I got when I posted these on Splitcoast Stampers - so there you go, lol!

The one difference between the two is that I sponged WHITE CRAFT INK over the design of the top card to achieve that soft, almost frosted look!  I love it! 

The background stamp is from our BAROQUE MOTIFS stamp set - a must have stamp set in my humble opinion.....if only for that flourish alone! 

So please try this design - if you'd like to order both or one of the aforementioned punches - please let me know, I will be glad to help. 


6 September 2011

Back to School! Create Easy Projects for Students with Stampin' Up!


As a mom of an university student in her final year, there really isn't much to buy once we're past the books, and tuition. We have accumulated plenty of school supplies so I have chosen to help her with clothes mostly.
BUT - being the crafter, I couldn't help but present her with a little offering, now could I?

I did decide on note pads, some cool looking pencils, sharpener, binder and gum - yes, the gum is a must! Oh and so is the hand sanitizer - egads!!!

Now established facts - she loves owls.  Stampin' Up! has an OWL PUNCH.  
Not too far of a stretch here, lol!

So I began with the colour of the blue binder , and the black pencils and was soon scrapping and punching, sponging away at making owls whilst watching another episode of Poirot on my laptop. 

The binder has a spine insert - so I used the paper insert as a template and our new SCORING TOOL and scored a 3x11 strip of black cardstock.  With the use of 'markers' the SIMPLY SCORED scoring tool makes a breeze out of creating folds in your paper - you no longer have to squint and stare to make sure you have the correct alignment AND you can repeat the same marking on another piece of paper - not bad when you have a gazillion folds to make for wedding invitations for instance!   

Voila!  I scored my newly-made spine insert!  On to stamping!!!

 With our BFF STAMP SET and WHITE CRAFT INK [ to stand out against the black cardstock] -- I stamped in a haphazard way and glued on two of my owls and before you know it, I had my newly-decorated spine!  It's cute and edgy - just right for someone her age. 


Now I'm on a roll - so what else could she use?  I decide on a A CORNER BOOKMARK!  These are like making a giant photo corner - again, using the SIMPLY SCORED board, I scored a couple of folds and in a matter of minutes, I had created my bookmark!  I shall do a separate post on creating a CORNER BOOKMARK - so stay tuned! 

 Also with our ROUND TAB PUNCH, there is no need to buy PAGE TABS - as this is what this punch is for. I punched out about a dozen as we can always make more!   We can draft up some labels for her tabs later on when she has a need for them.  And finally, I gave her some WHITE LIBRARY CLIPS.  

My third OWL has crazy eyelashes - ha ha.  She looks kinda sleepy which is not too far off from my daughter's look in the morning :)  I placed her gingerly on a label I made to cover the gum - just so we can use the owl in another spot later.  

And with a bit of ribbon tyed around the pencils - I think it all makes a good presentation....because in the end, we just want to mark Back-to-School as "special" and send them off with enthusiastic hopes of a great year ahead! 

Thanks for stopping by! 


Exclusive STAMPIN' UP! SUPPLIES used for this PROJECT.
CONTACT ME if you have an interest in any products - I will be glad to help! 

Cardstock = Marina Mist, Basic Black   Ink=Basic Black Classic Ink, White Craft Ink
Ribbon = Basic Gray Striped 1-1/3"
Tools = Simply Scored  (NEW!) - scoring tool;  Owl Punch, Round Tab Punch, and  tabletop paper cutter, craft scissors


19 July 2011

Custom Ribbon Flower Card to Cheer a Friend Featuring MY FRIEND from Stampin' Up!

Crafternoons Stampers,

Time to blog my latest...my correspondence continues this week with a card to a friend who is in recovery from surgery. I really wanted to pay special attention to this one - since I'd like to think that "Get Well" cards fall into that "special" category!!

This is one of the first chances I've had to begin with some of my fabulous NEW ITEMS from the brand spanking NEW CATALOGUE from STAMPIN' UP!  So you can imagine!

So settle down for an afternoon or evening and re-create this beauty for someone special in your life!  Or even make this a border for a frame - wouldn't that be lovely!  Hmmm, now I am thinking more here!


CLICK ON ALL PICTURES TO SEE A LARGE PHOTO


CREATING THE CARD

THE CARD BASE
It's a standard card size, 4-1/4 x 5-1/2 in STAMPIN' UP! Pretty in Pink cardstock. 
The Stamp
A CLASSIC NEW STAMP SET!!!!    

This is the greeting from MY FRIEND #122587. This set has versatility plus! Lots of images and two terrific greeting stamps so it will become a favourite among us. :)

Of course the WEDDING SWEET Stamp Set is another good choice - and its also terrific for many purposes besides the iconic wedding sentiments it includes because of the flourishes it provides! There is a smaller flourish included in the set as well as a lovely 'Thank You' stamp!


Step 1) Stamping


So using some ROSE RED CLASSIC INK - I stamped the HELLO greeting in the upper right-side corner.

Also using the same colour ink, I stamped the flourish design with the Wedding Sweet's largest stamp, going off the edges, and stamping twice before inking to get a lighter image.


Step 2) Add Spritzing/Smooching Effects
Want some fun?   Do some SPRITZING - and in part, some flinging, lol!  I made my OWN CUSTOM MADE SPRITZ by mixing a 50% solution of pharmaceutical alcohol and water into an empty misting bottle. Then to create my CUSTOM COLOUR - I dropped some  refill ink into the solution!!!!   I used a retired colour - Purely Pomegrante and swished to mix well. Pumped and directed the nozzle in the  direction of the card from one side - and sprayed.  I did it a couple of times, careful to stay mostly on one side of the card.  I immediately dried the card with my dryer to avoid the water pluming up the cardstock. No unsightly bumps if we can avoid it!  GREAT WAY TO USE UP THOSE OLDER INKS!!!

Next - I flung some of the SMOOCH using a nylon artist brush - flinging with style, lol! You do need to try to do it without over-doing it!
cardstock to the left is untouched; card to the right is spritzed, smooched


don't forget the back of the card :)


     The ACCENTS

Step 1) Add a Decorative Border - bonus: Stamp to Match the Background!   Using my NEW IN COLOR CARDSTOCK - POOL PARTY - a light greenish-blue reminiscent of the Carribean or a California sky! Very pretty colour!


With SU!'s Decorative Border Punch - SCALLOP TRIM BORDER #118402 - I punched both sides of a 1 inch wide strip of cardstock.  


TECHNIQUE TRICK - Match your Stamped Images: before attaching the border strip to the card - I challenged myself, could I "re-create" the stamped flourish on the card on to the decorative border and match them up?

Inked up the same Wedding Sweet stamp in POOL PARTY CLASSIC INK, and using my 'eagle eye' - I mimicked the direction of the rose red background image , so I could ' continue ' the stamped ' f l o u r i s h e s 'onto the pool party border strip. First time: NOPE!, but lucky us - we can TURN OVER THE CARDSTOCK AND DO IT AGAIN - and this time, I was able to make a pretty good match. Not yet trimmed, I could shift the stamped part to match the background of the card before trimming and attaching it permanently. Voila. If you have an eagle eye yourself, you can see I also added a slight match to the paper flower - see the flourish from the greeting shows up on the flower too! OK! Doing great.


Lastly I added some bling to help bring glamour to the border. Bling, bling, love the bling!


notice how the background stamp ties into the same image on the blue border?  Bird in glittery powder blue!


Step 2) The Bird and Leaf Punch Accents
Really not much to say here - its a punched Bird from a retired set from Stampin' Up!'s BIG SHOT dies - the Sizzlit Birds and Bloom. Which is kinda wrong, because there is one bird, and several flowers in this 4pc die set, lol!  But the bird is in GLITTER CARDSTOCK - oh yes! With a jewel for an eye too!

And of course, to balance the whole, a touch of a deeper blue in the same colour family - I found a punched leaf stem made of retired Bermuda Bay cardstock - uhm-hmm! Pretty!  I keep a stash of accents - don't you?  Grabbed two.  


The Custom Paper Flower Accent
Step 1 - Punch Out Flower Shapes and Supporting Circles With  XL FANCY FLOWER XL PUNCH #118073, punch out 3 flower shapes - #1,2,and 3.    
  With 1" CIRCLE MEDIUM PUNCH # 119868, in the same colour, punch out 3 circles.  


Fancy Flower Punch, Smooch Frost White (jar), Pool Party Ruffled Ribbon, and custom created paper flower (left side)

   TIP:When I layer the flower shapes, I often use circles to act as support between layers -   plus they provide a spot to glue one to the other. 
  
    TIP #2: I actually punched out dozens to make more flowers while watching TV - hey, its all about time management for me at times!

Step 2 - Decorating the Punched Flower Shapes - and Layering Together.# 1 flower shape: leave plain:
 #2 flower shape: I stamped large polka dots using our BACKGROUND DOTTED XL STAMP - this will stack on top of the plain #1 flower shape ....
#3 flower shape: I stamped only the center of the flower #3 using a smaller POLKA DOT  - this will be the top and final layer....

Now the fun part - SQUISH-SQUISH!  That's right - crumple up the two decorated flower shapes, #2 and #3!  Unfold Flower #2 so its slightly crumples but take #3 Flower, and crease it twice in two spots, and squish it flat to create permanent creases [ I glued the creases in place ]....

LAYER the Flower Shapes:
 Glue the punched 1 inch CIRCLES to the back of all 3 Flower Shapes, then, layer accordingly:
a) begin with Plain Flower #1 as the bottom...
b) attach glue to the circle of Flower #2 backside, and glue to Flower #1 beneath... slightly twisted clockwise so that the petals of Flower #1 peek through....
c) attach glue to the circle of Flower #3 backside, and glue on top of Flower #2 beneath - thus creating the top layer!


Step 3 - SPRITZ and SMOOCH the Completed FlowerAs with the card base, I smooched some FROSTED WHITE SHIMMER PAINT # 116854 on to the completed FLOWER and misted it with some GOLD GLOW SMOOCH SPRITZ #118770 spray. [you may want to do this over a protected surface - or in the bathroom like I do for easy clean-up!  Or try our cool COLOUR CATCHER for just this purpose!]

Optional - you could decorate the center of the completed Flower with other accents such as buttons, jewels, brads, bow, etc.  I have chosen to decorate it with a gathered Ribbon Circle and a Fabric Flower plus Glitter.  Read on!

THE RIBBON ACCENT

One of my new fantastic embellishments is the "ruffled, stitched ribbon" featuring our new IN COLORs - and I have it in POOL  PARTY  #122975 Its fab!

It has the heft and premier qualities of a beautiful ribbon that 'feels good to the touch'  - ruffly with that unmistakable grosgrain crisp yet silky so it slips through your fingers - what more could you want from a ribbon?

I turned it into a gathered circle to accent the  f l o w e r !  NOW THIS IS GETTING SPECIAL!  To gather, I prepped a needle with some thread/knot and stiched up one side of the ribbon, taking little 'dips' down and back up all the length of the ribbon - about 12 inches.  Then tugging till it schoooshed its way into a circle, and stitched closed. With the last of the thread, I stitched the ribbon accent right onto the paper flower!  

Still...I looked and saw that the ribbon accent left room for more!  It's open center left a bare spot - so I thought, hmmmm......I had originally thought a half-pearl would be in order. But seeing that made my card seem predictable....no good.  So I began to press my mind a little, and I grabbed a small fabric flower in white, and using a dab of glue and a small tool's handle, I pushed it right down into the center of the ribbon circle. This distorted it, but that was in keeping with the whole flower - a little grungy!   Finally, my glitter went floating down onto another dab of glue, and voila!
  MY FLOWER IS DONE AND ITS PRETTY SPECIAL!!!


- OK,  re-group and finish this card! -

You've stamped the greeting, and the flourishes onto the pink card base in a co-ordinating deep rose. Check!
You smooshed, spritzed some accent decoration to the background in a reddish and gold tone. Check!
You created a decorative border in a complimentary colour - and optional, stamped it to match the background flourishes! Check!
You punched out a bird in some pretty cardstock! Check!
You've created one special paper flower accent, ribbon and all! Check!

PUT IT ALL TOGETHER!!!

Estimate the placement of the Paper Ribbon-Flower Accent  - I chose under the greeting, slightly less than half way down the card; and then slide the border under the flower. When you have agreed that it looks good - make it permanent and attach with glue or sticky strip.   Attach in the same fashion, the bird so it sits atop the border facing the flower!   Tuck in the leaf accents, trimming as necessary. Finally, I like to add a bit of distressing to the bottom edge, so I sponged on some Rose Red ink to the bottom edge of the card. 

There you have it!!!!


Is it not special?  I know it took time - and ....
THANK YOU FOR READING THIS REALLY LONG POST ....
... I am sorry, but sometimes you just have to write it all down.  Succinct I am not!  
 Do what you will for the INSIDE GREETING!  The MY FRIEND stamp set does have another greeting stamp in a smaller type: " my friend ", so I chose that for my inside greeting and then I also made a bit more by taking a strip of no particular length of paper, folding it haphazardly, and gluing it down, then topping it with a punched shape and stamped " GET WELL" sentiment.  You, of course, do what you will!  


12 February 2011

Valentine Card - doesn't have to be PiNk!

No, no, no....it doesn't!

It's all about your own style - and here is one I made while experimenting with a technique.

I wanted to a) emboss and b) colour with embossed surfaces.

So I chose to:
1) ink my VERY VANILLA cardstock with all sorts of ink colours using SPONGES.
2)then I EMBOSSED my coloured and cut 4-1/4x5 inch rectangle cardstock using an EMBOSSING FOLDER where I sandwiched the cardstock and pressed it through my BIG SHOT DIE-CUTTING and EMBOSSING MACHINE.
3) now I used a separate sponge to ink over the entire piece with BLACK ink - quickly and lightly!  This colours the "raised surface" created by the embossing folder.  To get a more precise ink effect, I could of used my brayer tool.

Now, I punched out a black HEART with my Heart PUNCH, and a blue circle with my 1 inch CIRCLE punch and attached them with a black flower BRAD.


Chipboard Accent Update - My Daughter Made a Valentine!

However amazing on her part....its not for me!  I'd like to see the results of a poll of crafters who have kin living with them, children no less...who will not craft much!  Honestly, she will on occasion - but ironically, I can not expect a card - she tells me she does 3 per year, that's her limit! LOL!

But - if not for Mom, then she doesn't mind to hit my craft studio and go crazy. And when she does, I love her style!

Here is my chipboard accent (please see Feb 3rd post).....on a card she made for a friend!


My daughter's card she made as a Valentine for a friend. 

Told ya she was talented, oxox! 

Supplies: Stampin' Up! Basic Grey Pattern Paper(striped, dots), Rose Red and Pretty in Pink (2nd layer and inside) cardstock, Vellum specialty paper,  Love You Much stamp (heart), Heart Punch, XL Flower Punch (inside grey flower).  Misc:  Heart Border Punch (Fiskars), pale pink ribbon. 

19 January 2011

Valentines Heart Punch Card and Busy Patterns Technique

Helloooo.....been such a long time between posts as I am in the throes of "re-organizing"!   Gosh where does all the stuff that clutters every spot come from? Anyways - I think its a good idea to use January as 'the' month to de-clutter esp. here in the wintery North.  Not much fun outside anyways, right?

But there is fun in our craft corners - and I tried a little technique with this card, so I'm here to share!

 I received a card in the summer which embodied a colourful personality - and it really made me feel great, all sun-shiny and happy!

Upon close inspection, the card involved no less than 3 patterns of cardstock. Very busy and different patterns!  Layered together as a "strip" or band against a soothing backdrop of a solid colour. The focal point - a 3D flower sat on top, slightly off-center. And all made sense together! WONDERFUL!

So: busy patterns layered together, soothing backdrop and a dimensional focal point! Voila!

Now I tried it, here it is - my Valentine's Card for a friend ( can't say who cuz they haven't received it yet!)


Colourful Patterned Band
As you can see, I made my strip from 3 patterns!  I chose the patterns from a co-ordinating collection, but as long as they share something in common in colours, you should be good!  

Combining Patterns is easy if you follow a few guidelines:
      - try 3 similar patterns - for example, all florals or all dots; 
      - or a 'combo' of one or two similar motifs (ex: flowers) with a graphic element (i.e. plaid); 
      - vary the sizes (tiny print, medium print and large print),

....I used a large plaid, with 2 floral motifs [ one a small print and the other a mostly larger print].  But they all shared  similar colours!  

Soothing Backdrop
My background is a soft pink framed with a bit of vanilla - and I have added texture {Stampin' Up's Elegant Bouquet Embossing Folder] by running the cardstock through my Big Shot - but over-all, its pretty much a large dose of a soothing backdrop to support the busier elements in front. 

Focal Point
I punched out 3 hearts in a glittered cardstock - and embellished them with buttons.  I love adding buttons - for such a small investment, they add a lot of 'punch' - lol! 
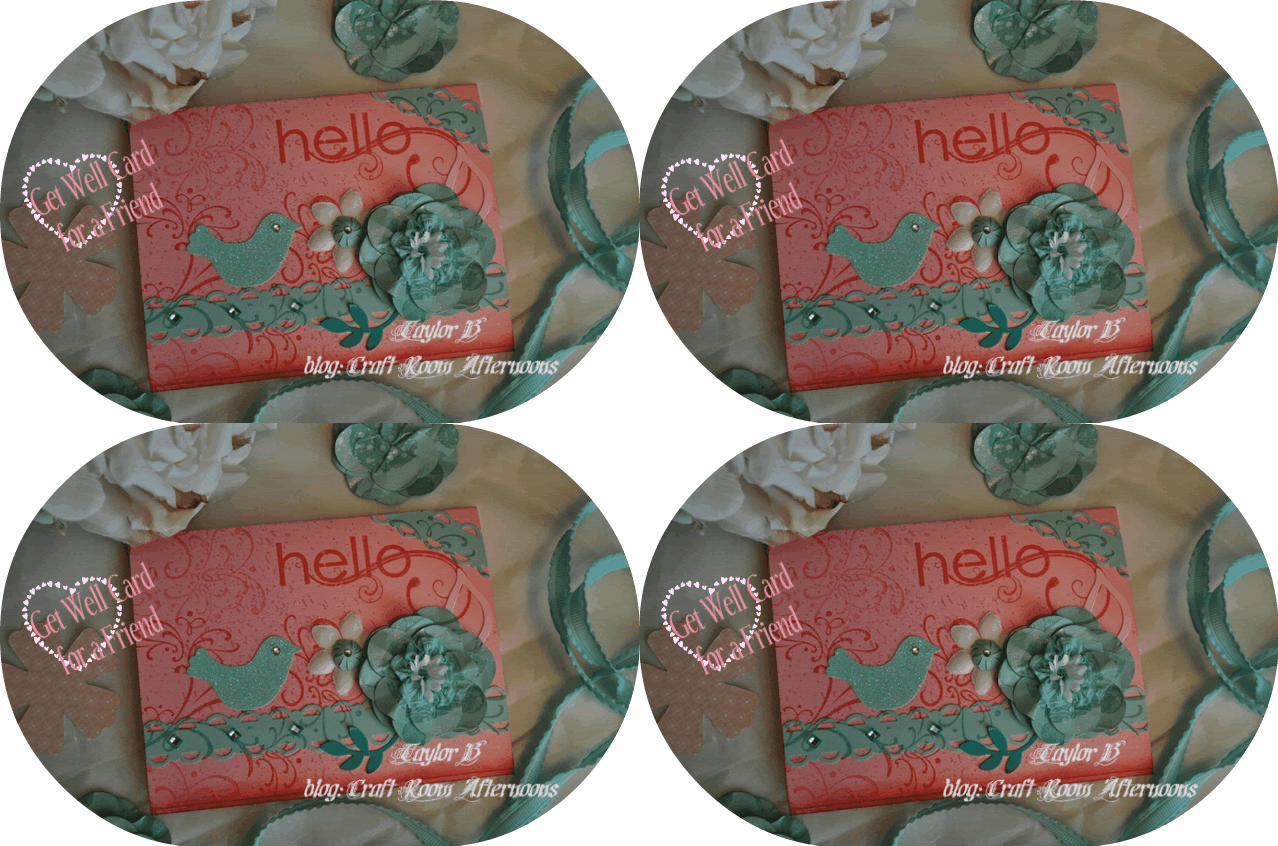

One problem emerged - my card was 'front heavy' and in danger of falling forward on its face!  To counter-balance this, I added a layer of cardstock to the back as well, and an embellishment. This weighed the problem out, as you can see here....

back of card

So there you have it - I think it turned out swell and the reaction from my daughter was great when she saw it! Unfortunately the picture doesn't do justice to the lovely colours - but I believed I achieved that zipitty-do-dah look I was after!   

TRY IT YOURSELF - its great to use up lovely bits of left-over cardstock! 

Thanks for swinging by!

STAMPIN' UP! SUPPLIES -  Heart Punch, cardstock in 'Pretty in Pink', Textured Embossing Folder 'Elegant Bouquet', 'Rose Red' Classic Ink Pad & Marker, sponge. 


Template by: