Showing posts with label Miscellaneous Projects. Show all posts

14 April 2011

When "Home-made" is better! Use Punch Art for Class Presentations!


Today's hot word is HOMEMADE ....
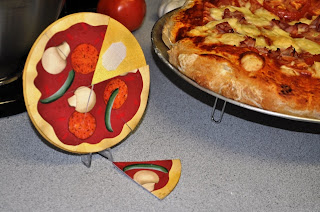
CAN YOU TELL WHICH IS THE REAL PIZZA?
LOL!


I personally think this is picture shows works of art - truly Renaissance worthy!
But that is because - moi - made these, lol!  And I am not being too humble, am I?
But, honestly, my "real" homemade pizza was the best - I love making homemade pizzas because I love, love the thick, puffy crust!  Plus - I can make it tailor-made to our preferableness (yes, that IS a word!)....and fresh ingrediants, mmm-hmmm!

The usual around here is FRIDAY NIGHT PIZZA - and a Movie!  And I just overheard an adorable, little guy asking his Mom in the grocery store whether they could make Fridays, movie night!  So I helped him out, and said "Pardon me, but we have Friday night movies too! With pizza! It's really fun!"   So hopefully, the little guy gets his way...but I am thinking, its probably Friday Night Pizza in lots of households - practically a North American tradition .

Anyways - the funny thing was, that here it was last Thursday, the 7th; and my daughter came to me and asked if I'd help her with a little something for a class presentation project due Friday.  She is in university, but I was intrigued when she said they needed to have:
 a PIZZA PUZZLE and a WINE & CHEESE MATCH-UP CARDS. 
BUT - the really funny thing was -
 I had just learned HOW TO MAKE "MUSHROOM" PUNCH ART the day before!!!
 I was astonished how the Universe was all coming together!!!
And since, I love a challenge - it was ON!

PIZZA PUZZLE


puzzle pieces attached with velcro tape

First I made the pizza base - I didn't waste good stuff, so I cut a large 7 in circle from a cereal box and covered it with a beige-yellow no-name cardstock.  Then I re-created another 7 in. circle in SO SAFFRON cardstock by STAMPIN' UP! naturally.  Which I distressed with our DISTRESS WHEEL and a little SOFT SUEDE ink.  That was the plain part, up next was the fun stuff - making the little mushrooms!

MUSHROOM PUNCH ART 
Need: Oval Punch (small or medium but large will do if necessary)
Circle Punch - 3/4 inch or 1 inch  ( use larger if creating big mushrooms)

The CIRCLE and the OVAL PUNCHES are relative to each other according to the size of MUSHROOM you desire. But a little adjusting can work wonders.

1. Punch out a Circle in a light beige cardstock
2. Using your Oval punch - nip a small chunk out of the circle, using the "end" of the Oval punch.
3. Punch out an Oval in light beige cardstock. 
4. "Fish" the Oval shape - glue a small strip of paper to one end of the Oval shape, and insert the Oval shape ' BACK INTO THE OVAL PUNCH' exposing one "side" of the Oval, and 'PUNCH' a big bite out of the Oval - you basically create a long 'C' shape of the side of the Oval.  REPEAT to other side of the Oval shape - you will have a shape that is narrow in the center and wider at both ends. 

5. Assemble ' mushroom ' from the two parts you have created.

ILLUSTRATION depicting Mushroom Punch Art Steps


TO VIEW LARGER IMAGE:
CLICK ON THE ABOVE PICTURE
(or set your computer's zoom - see 'wrench icon' top right of your bookmark bar)

The rest of the pizza I just made up as I went along ......that is GREEN PEPPERS made with the OVAL PUNCH once more - punch a green strip of cardstock, just along the side of the Oval Punch, slide it just a wee bit above and punch 'again' and you will have a elongated 'C' shape - sliced pepper!

And of course, that is just a wonky circle which was trimmed from a large CIRCLE PUNCH shape of retired DUSTY DURANGO cardstock.  Then, I went crazy with a POLKA DOT STAMP and lots of ink colours ranging from white to dark reds, and browns.  

I gave everything a swipe of brown ink around edges - even highlighted a few parts with a light brown marker.  And since we need TOMATO SAUCE - a un-even edged circle of REAL RED cardstock did the trick!
We "layered" our pizza - and since it is a PUZZLE - we did not clutter the surface, but left it so we could CUT the PIZZA BASE and the PIZZA TOPPINGS/SAUCE into 6 SLICES - which worked out to be a little under 3 inches around the circumference. 
Attach VELCRO TAPE (Adhesive-backed) to pizza base, leaving the two parts of the tape together - ALIGN the pizza top slices - then curl off the adhesive backing, and slap the pizza slice into place and press hard to create good adhesion. VOILA - a PIZZA PUZZLE! 


MATCH-UP CHEESE AND WINE CARDS


Next we needed to make a game for MATCHING CARDS of varieties of brands of CHEESE and WINE. \
The TOP NOTE DIE and my BIG SHOT 
were just what I needed!

[ The objective:  each Top Note is cut in half, labelled and spread on the table. Choosing a Cheese (brown cards) search and pair with a compatible Wine (red cards).]

1. Punch out TOP NOTE Shapes - as many as reguired to match-up! In our case, we need 28 so I punched out 14 Top Note shapes in a variety of colours.  My daughter meanwhile, made labels. 
2. Cut Top Note shapes in half length-wise.  Now you have 'pairs' !!!
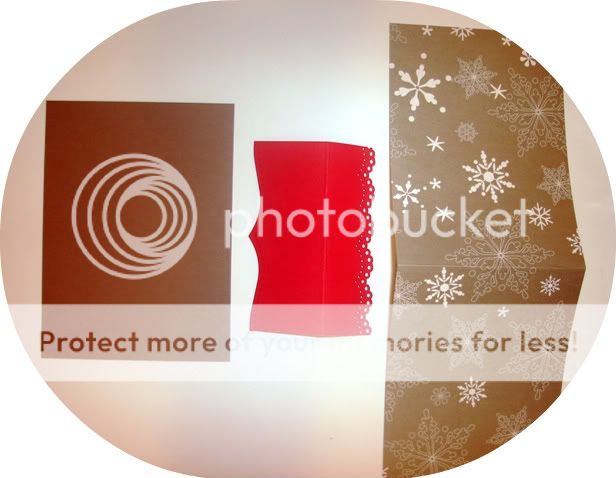
3. Create a POCKET.  Follow any template you wish for a box - I basically measured and cut a rectangle slightly shorter than the top note half-shapes, and then scored along both sides twice 1/4 apart, and the same again on one shorter side.  Clipped the parts where the edges met when I folded it together and glued together.  I did not create a 'back' as we were gluing the boxes to a paper insert for the project's presentation binder. 

Hope this helps give you ideas on how to use our crafting tools to help with presentation work! 


Beverly


29 December 2010

Patchwork Page or Scrapbooking Christmas with your Scrap Pieces!

Now that we snipped and glued our way through Christmas - its time to think about scrapbooking some of those pictures!  DO IT NOW - at least 2 pages!!!!   If we put them in a box - ya' know what happens, they will sit there ad infinitum!

But - if you are like me, you purchased papers and accumulated a ton of scraps. I throw the scraps into a bin on the floor to save time. and so looking at it the other day and finding some old 'purchased' (gasp!) cards, I put two + two together and decided to do this......


and close up.....


And...I like it!  Its bright and cheery - just what I wanted.  I have to make some choices as to how I will use it, but that will come a little later. The feeling of satisfaction I achieved was that I recycled, and I managed to use up more of the pricier papers....and if you have read my earlier posts, you know its important to me to use up what I have because, after all, we pay for it with our hard-earned money!  

Now, I had one lady at a party recently comment - why would I create a page, isn't that why I purchase pre-designed paper for?  And yes, it is. But. If you have a quiet time, want to create something so unique that NO-ONE else is going to have in their albums - then I say, have fun and try this!  

TIP - I used white glue to assemble this, plain white glue and a glue stick and a slick surface ( two separate sheets of those annoying large,glossy, real estate advertising  that shows up every other week!) - and so, after you are done, position the paper between something flat and heavy to weigh down the paper to create flatness. I say that because the paper does buckle a bit from the water in the glue. This method is too much to use up expensive tape adhesive! Just sayin'! 

MORE OPTIONS Another cool thing you can do - is SCAN this and make a pdf. file!  Your own "digital design"....that is probably what I will do next. Then you can download and print your design and create other things such as tags, book covers or even wrappers for crackers, wall decor projects....lots of ways to use this. 
OK I will be back soon with some more scrapbook ideas for your holiday pics!
Bye for now!
xx

27 June 2010

Coffee Bean Bag transforms into Gift Bag!

Blog Candy Winner Diane Gardner received her goodies safe 'n' sound.
It has taken a bit time to organize it because I offered to order the winner their choice of ink pad. When my latest order was delivered, I was ready to package it up and send along the Blog Candy.......and this is where I have fun.....packaging is one of those areas we can go in any direction!

I chose to go a bit whimsical by dressing up a plain white coffee bean bag!  You know the type in the grocery store?  I don't know about you - but I constantly 'see' things that I think " I could decorate that!"   Especially blank white things, lol!

But it turns out to be quite an effective choice for a small package of goodies.....here's a shot of how I played with packaging a few bits and bobs that made up Diane's prize.....


here you go....see? Not so bad!


Close-up of greeting, and you can see the mesh I glued to the bag - it sparkles!  Love anything that glitters! It's hard to see, but there is a gem on the letter 'O' in 'You'.  

TIP - to glue the mesh, I brushed the back of it with glue, pressed it to the bag, and using some wax paper to act as a barrier, applied a weight to it (use a heavy magazine) until the mesh had remained attached - otherwise all those different threads can get a bit whiley!


Here is the blog candy!  


Here is the ink pad - Diane wanted Melon Mambo - great choice! 
I used the same mesh now to wrap around the stamp, decorated with an extra die-cut flower.


More die-cuts, a ribbon ring, chipboard pieces and a circle mini-album. 

I was able to fit all you see into that coffee bag except for the mini-album,
 sprinkled tiny flowers in, topped it with tissue to keep them from bouncing around,
 secured it closed and punched 2 holes through the bag to create a sheer ribbon bow. 
Then the bag and mini-album into
 a bubble pack! 

So lesson here - look to your local grocery store for your 
next gift bag! 
LOL!!!


25 June 2010

Make an Exotic Tray as a pretty catch-all!


Good afternoon!  It's Friday - and I bet the end of school for a whole lotta students who are thrilled to be free!!! So enjoy your summer with your children, grandchildren - every day is precious!

I am back today with a project I worked on for almost 2 days - but that's because I was designing it as I went along - so you could do it in about an hour if you had instructions, etc.  I will be offering instructions for this once I make a PDF file - so look for it!

OK. I love this!


I started by making a folding card - well, more importantly, I started because I wanted to use some of the fantastic new things that have been accumulating around the studio! I have also been wanting to do some of the 'vintage' style that is exploding all around the world!

So - a folding card which ended up looking pretty much how you see the middle section and the two wings.

And while I was staring at it, the wings wide open - it struck me that I should turn it into a TRAY!

Then, a tray that could be useful around our cluttered home - I always can use catch-alls to threw my rings onto, spare change or to keep some perfumes - anything really!

I created a template for a tray - which basically is following the shape of the center & sides, deciding how far the front of the tray should extend, and creating "FLAPS" to secure the tray to the vertical sides. The front of the tray has a lip - a flap that folds up and over itself.  And that was it.

Then I had another inspiration - I wanted a smaller container to catch little things - pennies, rings, who knows! So I grabbed some velvet ribbon and made a flower and a leaf and attached them to a golden coloured votive candle holder. Some gems and a pearl - its so cute, I think I'll make more of them!


OK - here the pictures!


The small velvet flower on votive candleholder! 


.....used as a spot to drop my rings in! 


Die-cuts, stamping (the shadow stamping on the brown) ...


Securing the sides with paper twist turned 'decorative'...and a close-up 
of the tray's front 'lip' - which is also stamped, inked.....


The interior of the tray is stamped in a monochromatic matching shade....


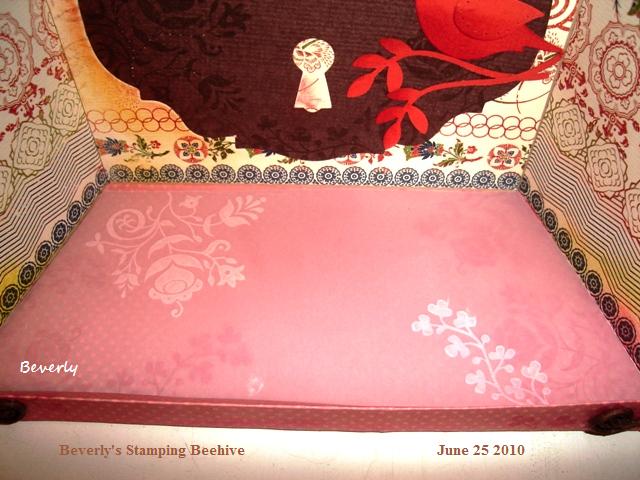
and to protect the tray's bottom from damage, I cut a vellum cover - which I stamped on its 'reverse' side
using white CRAFT ink - because of the smoothness of the vellum's surface (warning - let it dry first!)...


...vellum cover in place, and because I stamped on its underside, those white floral images
will not be harmed either!  Gotta think of these things, right?


Close-up of the flower I made using 3 layers of flowers in descending size and a white brad
to tie in with the background colour of that delicious exotic paper!
I made a border pulling out some of the 'orange' of the paper, and to make the top as interesting as the 
rest of the piece, I used some SCALLOP punches and tucked them in behind the scallop border.....


So here it is again!  It's strong It's pretty 
and it's my new favourite! 

Hope you enjoyed it! 

4 December 2009

Mini-Album using Die-Cuts


 Here is a little project I did this morning - early - really early, lol!  Mysterious how the mind works when you need it to! :)

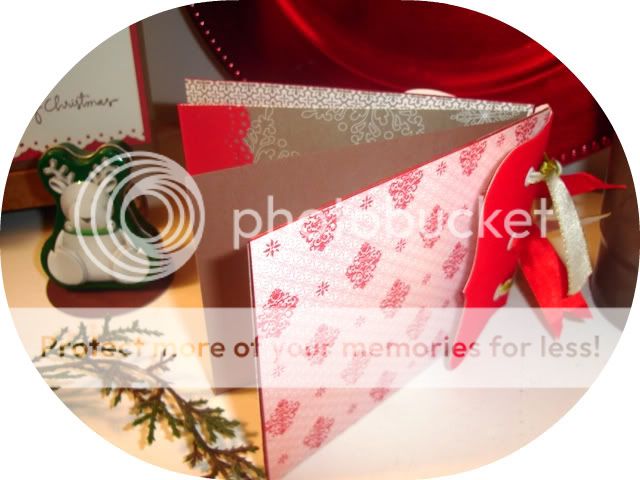
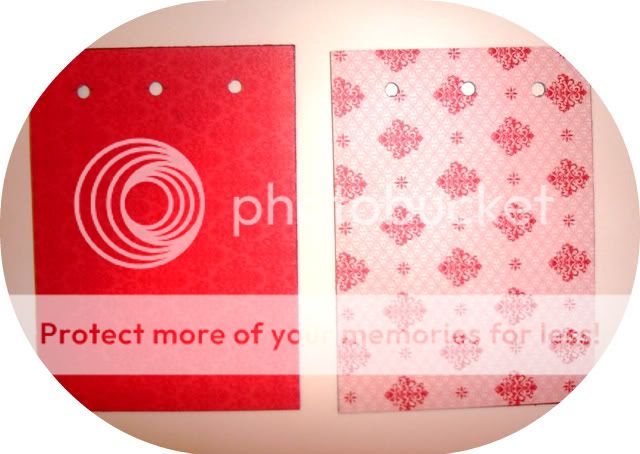
I got this idea because another company Quickutz released its SugarPlum series of die-cuts, which are essentially components for making a mini-album.  However, I thought we have the 'TOPNOTE' die-cut - a very versatile die-cut used in many a project; and one can merely use chipboard to make square or rectangular pages!  Use a Crop-A-Dile or similiar tool to make holes to add a method of attaching page after page - and voila!

So I began by making rectangular chipboard cover and pages, and proceeded to ink the edge with red ink, and then choose from my co-ordinating holiday papers to decorate the Covers and each page.  To make the spine, I used the TOPNOTE die with my BIG-SHOT die-cutting machine.

I created my holes and used some beautiful grommets on the front of the spine, and saved some money by using plain white eyelets on the back cover. Without any nice rings in the house at the moment, I chose to use ribbon to tie the piece together. 

I decorated the cover by adding embossed design, and a smaller piece of clear sheet to which I affixed a small bird and flower.

I don't know yet what I will put inside - but I really liked how this came out!  Hope you try it too!

Add as many pages as you want to this mini-album - by using grommets or brads with center holes, or rings..you can take it apart to add or even remove a page.

21 August 2009

RED, OLIVE AND A NEUTRAL - an INVITATION and a MENU for SUCCESS!


Hmmm.... the colours red, olive, black and a neutral?  What can we do? Well....here is what I came up with!
I imagined an invitation and then tucked inside - a small menu tag for the recipient to have an indication of things to come.....wouldn't this be lovely to receive?  Aaaah, if only I could be invited to have lunch under a beautiful gazebo....but I am lucky if I get invited to Tim Horton's - LOL - actually, I love coffee and a donut - I AM Canadian after all , ha ha!

Tutorial - CREATING A FLORAL 3D ARRANGEMENT. 
VASE = to create the vase and floral or leaf arrangement - use our OVAL PUNCH - and punch out an oval, and then trim the one end so its flat - that's now your vase's bottom. Next: trim the opposite end at a slight angle (or flat) - and there is your vase!  You can add some 'highlight' with our white gel pen (see supplies listed below) and/or add a small gem to add some 'twinkle'.
To create a lovely arrangement: stamp flowers or leaves or both, trim them around their 'outline' (doesn't have to be exact)....and you can glue them to the back of your vase and then use a glue dot to raise the whole piece above the surface for a fascinating look. People will really like this look!

Well - I think this colour combo is lush together - don't you?  Try it!


Stampin' Up! Supplies: cardstock = Textured Real Red. Whisper White; ink = Old Olive, Black, Real Red, White Craft; white gel pen = Uni-ball Signo;  colouring = Stampin' Pastels; stamp = dear friend; punch = large oval (created vases); misc.=ribbon, adhesive, glue dots.

19 August 2009

Get your small ones stamping & colouring – a bookmark is good!

One summer’s day project coming up! Misc. August 09 004

Stamp, stamp, stamp away ‘together’ ! They will luv!!! you to pieces for it! And if not,then they can enjoy the colouring! And why not – look at this guy – so much to colour!

Cut out a bookmark shape, layer it on sturdy cardstock, find some colourful ribbon – what-ever embellishments you’d like really…your children should be ever so pleased with themselves, as they should be! :)

Stampin’ Up! Supplies: Love Always stamp set, Love Bug {Hostess Level} stamp set, Whisper White cardstock, glitter. Misc. Supplies: DCWV paper, assorted ribbons.

Template by: