Showing posts with label Altered Art. Show all posts

21 March 2013

Altering "Sycamore Street" Designer Series Paper for the FUN of It!

**Hey, remember me?  It has been awhile since my last post featuring Stampin' Up! projects but I've been a'craftin', I just have been a bad blogger!  So here I am with a little idea I had and have decided to share :)

Ever get a pack of Stampin' Up!'s beautiful Designer Series Papers and just don't know which patterned paper you want to start with?  And you hum and haw, and  basically stall? Well, I have that happen all the time!


So this time when my friend Maria shared some of her SYCAMORE STREET DSP [ since during SAB I went with 'other' freebies ]....I looked at the patterns and just decided to play ball with them or put them down!!! LOL - I mean, I decided to be fierce!


Here is what I was looking at:*


* And looking over them, I was really intrigued with these two...


So I decided to do this....cut along the exotic floral, blue-lined shapes and attach them to the fish-scale light blue pattern and flip over the "in-between bits" and attach those to the raspberry chevron pattern!  Then I cut both into strips. Have a look.....in other words, transfer one design ontop of another! 
Play around with the patterns and be just that - playful.  Or you might miss out on a really pleasing result, like I said ' play ball! '

Next, take your newly-created "strips" and play around with those on more patterns!  


I decided to start with a white 12 inch paper, and cover it with strip after strip - like quilting in a way. 
I juxtaposed colours I liked, and the paper patterns all seem to work well together {SU! does that for you!}


 And before you know it, I had MY OWN ALTERED DESIGN....TA DA! 


 I LIKE IT ! 
And I will use some solid colour mats or frames to add my photo lay-out later on, plus I really am looking forward to embellishing it - flowers, charms, who knows what goodies will follow!

MAKE A CARD

You can do this in a simple fashion too.  Yes, just add strips of different patterns, and even of different widths, and it makes a great card.  Here is mine without final adjustments like a greeting or embellishment, but you can see what I mean.


I HOPE YOU GIVE THIS A TRY WITH YOUR OWN DESIGNER PAPERS!

CHEERS AS ALWAYS! 


15 February 2012

HEART WALL DECOR

Gooood Morning!!!


Have you ever had an item kicking around your closet forever - and you don't seem to get around to crafting with it like you planned the first day?  YUP - we all know that feeling!  Well, here's one of mine {trust me I have many}.....its a wood heart and I can't even tell you where I got it, its been that long!  


Well - I dragged it out to the craft table and there it sat for a few weeks!  I stared at it - it stared back.  It was touch and go there for awhile!  Finally, I felt enough guilt to decide to work it!  


Then I had fun - lol!   So now I am feeling the love with this on my wall right this minute!  


Challenge Entry:  


Decorate a Wood Carft Item
Supplies:
paintable wood craft item [preferably with drilled holes - but you can improvise]
craft paint, [colour, and a white paint]
paint brush, 
fine grit sandpaper or sanding tool {in a pinch, a foot spa sander, or nail sander}
background rubber stamp [ex) script, text, floral, hearts,etc)
stamping waterproof ink [Stampin' Up! Basic Grey or Basic Black]
hanging material [ribbon, wire, twine, etc.]
Decorative Cardstock [ plain for flower, designer paper for banner]
Punch - for flower [example uses SCALLOPED FLOWER punch]
gem or pearl embellishment
stickles or glitter glue [ Stampin' Up! Cherry Cobbler Dazzling Diamonds]
thick glue dots
glue 


Instructions
PAINT YOUR WOOD CRAFT ITEM
Paint your wood craft item {my example, the heart} in the colour of choice {mine is lt. blue} and let dry; lightly sand when dry - then repeat the same again. 
Take a saucer or small foil tray and dab some white paint into it and add 2 or 3 drops of water and mix. Now you have a ' white wash '.  Paint on this white wash over your painted/sanded wood item.  The streaks are a good thing!  But not wide streaks - blend a little.  Do this until your piece is more white than the previous colour.  When dry sand lightly. You can sand till the wood shows through on the edges if you like - if you don't like, then just sand so the wood feels smooth. [note- paint 'lifts' the fibers of the wood, it swells it a bit which is why we sand!]


STAMP AWAY!


Now that your piece is painted and prepared - STAMP IT!  Take your background rubber stamp, and your ink pad and stamp the entire surface well. NOTE - this is going to work the 'first time' - so practice on paper first to see how well you stamp a large stamp. 
 When ready, place it over your painted craft item and stamp the design onto it.  This took 3 trys for me - as my heart is wider than my stamp and I stamped the center first, then added the remaining side areas.


OK - if you feel you screwed up - or don't like the look of the stamp, just RE-PAINT and start again! 


But you like it, so moving on......
Make your embellishment/ FOCAL POINT
A hand-made PUNCH FLOWER is a cool thing these days - they are in every craft project!  You could also use a bought flower to save time!  
Making a Punch Flower
Punch out several Flower shapes in one or two colours of sturdy weight cardstock. [Stampin' Up! cardstock is sturdy at an average 80 lb weight.]  NOTE: you can crumple the cardstock to make forming the flower easier and it gives that shabby chic look!    
Next - leave one flower shape intact. That is your foundation piece. After that, take a scissor and snip out a section of one shape and roll the flower like you are making a cone shape - bring the two cut sides together and overlap one section over the opposite side. Glue together and hold till the glue works. You could use a clip to help.  
Then snip out 2 sections of the next flower shape and repeat - this time the gap is wider where you cut away the section but requires you to do the same thing - bring the cut edges together, and glue overlapping them so it looks like a complete shape once more. 
Then 3 sections on the next one....and so on, till you are done with the punched flower shapes. 


When you are finished preparing each of the flower's sections - bend the petals back a little - this takes a little patience {as if the last section didn't,lol}.....but it is possible to bend those back. I use something round like a pen to roll the petals against - and I hold them over my finger while I work the next section. Do your best - and little tears only make it more 'hand-made', so don't sweat it! 
NOW - ASSEMBLE YOUR FLOWER - by gluing the smallest section into the next larger section!  Flatten the tip of the bottom of your flower a bit, and glue into place. Keep building your flower this way till you are ready to glue it to the flat foundation flower shape.  And your are DONE!  CONGRATS!  


TO FINISH - I added the flower to a banner strip I made from decorative paper. But before I glued the flower on, I added thick glue dots to the back of the banner, the entire length. This allows for it to float above the painted wood piece!  Now glue on the flower and when dry, add your decorative piece to the finished wood piece.


TO HANG - add ribbon such as my example. I tied 2 pieces of ribbon, 7 inches each by tying a knot first at one end and inserting the ribbon into the holes leaving the knot to be on the front!  Then I stitched the two remaining ends together.  You can also do this with one long piece of ribbon - about 14 inches long. Or use twine, wire, etc.
 Add beads too!  Anything you wish to decorate - use your own ideas!

THANKS FOR STOPPING BY! 
HAPPY CRAFTING! 

1 January 2012

Decorating in Many Ways Around the House with Stampin' Up! Supplies


This dollar-store clock was altered with a few of Stampin' Up! punches and Designer Papers and of course, some gems to add some cheery zing to the kitchen!  It's easy to do - all you need is to pop off the back of the clock {usually all you need is a screwdriver} and then its up to you how you want to decorate!!!

I used a lot of circle punches, Ornament and Bird Builder punches. Then a die strip called Northern Frost to make snowflakes [actually every year I make a whole carton of snowflakes so I can grab them when I need 'em!]  I also hot glued a string of cheap christmas pearl trim around the edge {as long as the cover goes back on - throw on the embellishments!}.plus buttons..and topped it all off with a healthy dose of glitter sprinkled everywhere!  


Here it is in the kitchen!  I am not afraid to use it as it didn't cost much to make but what's important is the it brings back good memories every year when I will glance at it :) 

11 March 2011

Storage - Recycle Tin Cans, Boxes


Ahhh, my storage issues continue.  

I wish I could go into my craft room and it would magically 
extend it's walls each and every time I need more storage, but alas, that is not going to happen.
So I dream up my own solutions. I think I have a natural compulsion to cover up things - so the two things go hand in hand, my recycling jars, tins, boxes, etc. and more craft supplies finding their way into my craft room! 

I also am not a fan of 'too' matchy-match components, which is why I decorate my craft room trying to balance purchasing items from collections, and found objects like the tin above. 

Anyways, I made a rough effort by sanding the edges of the paper I glued to the tins, there are 2 of them, and adding plain twine as an accent - my 'bow'.  I also just cut out the scallop trim from a packaging -it was pretty packaging - so why not! 

I recommend using STICKY TAPE for most of this project. 
TIP - use an old nail file to sand the tin (just a smidge) so the glue can BITE into the surface. The fat wide foam cosmetic nail files work great - the coarse side. Save your nice Sanding Blocks for cardstock. 


CLICK ON PICS FOR LARGE VIEW


SUPPLIES = STAMPIN' UP!  Patterned Paper: So Saffron and Bermuda Bay(lid) and Basic Gray (body)
Sticky Tape, Sanding Block


7 March 2011

Fat Page Swap - Part 1

Good Monday Morning - hope everyone is well and ready for a new week!!!

To start my blogging off, I am showing the results of a FAT PAGE SWAP I organized with a couple of fantastic people!   Today I am showing 2 of the 4 projects involved.

If anyone is wondering what a FAT PAGE is - commonly it is a 4x4 inch page decorated by creative means with a small area to the left for punching holes to allow several Fat Pages to be turned into a Mini Album.

So here are the two pages exchanged between myself and crafter Vernette through Love is in the Details forum around Feb. although Vernette did a variation on the theme and created this wonderful squash booklet, but keeping to the 4 inch guideline....

Vernette's Fat Page 


Front - very nice!


Tied Closed - see those squash pages.....


Open....open....


Voila!  Look at all those pages!  Great Idea!

Beverly's Fat Page for Vernette


Front
                                                            
       And here is mine.......I am using several Stampin' Up! supplies including the Heart stamp from the Love You Much set, and the background stamp, Tres Chic both currently in the Idea Catalogue.


Hidden Pocket Tag


Back

Back with Tag (backside of tag)

Here is a few more pictures to show how I made my Fat Page from a plain brown lunch bag....


Choose how you wish to cut the bag - I chose to use the bottom because
I liked the little flap, which I decided would be interesting to decorate. 
You will have 2 raw edges which you can create a small pocket as the bag is 2 layers thick right?


"SEWING" PAPER TIPS
I sewed the bag with my machine, leaving gaps for a pocket, and where the flap is connected to the bag (see arrows).   When sewing paper - I use a stitch length from 1 - 2 inches, depending on the thickness and I may  adjust the tension (usually at 4-5). Try on a sample piece to make sure that your stitch is catching 
properly "underneath" - you can also use a ZIG-ZAG stitch.   
HAVE FUN -  be less concerned about the straightness of your stitching - its all part of the look!  


Anyways - on a project like this, one side of your stitching may look good on the FRONT, but you can HIDE a lot, by layering the back with cardstock.  Or, you use cardstock for your design reasons. I did both. 
BUT  add the brads, eyelets or anything where parts need to be hidden to your paper BEFORE you attach the layer.  

Hope you enjoyed this post.

Tomorrow I will add Part 2!


30 April 2010

Alter an Alphabet Letter for a New Look!

Hey!

Ever think you may not have exactly what you want in your stash?  Well - maybe you do but you don't realize it!
I will show you how to 'alter' a pre-finished Alphabet Letter - watch as it goes from plain fuzzy yellow to crazy, treasure glitter!

OK - this morning while having coffee, I looked around to see what I want to work on in my craft studio.....when I spot this book, a project that is a work-in-progress. You may have seen my earlier post when I altered a children's book into this.....here is the cover:


It's covered with new paper, but its bare - it needs embellishing!
I figured a good place to start was to add an alphabet chipboard letter as my beginning point - and later I can progress from there. 
But a quick look tells me that I do not have any letters slightly resembling my book!
Time to do some altering!!!

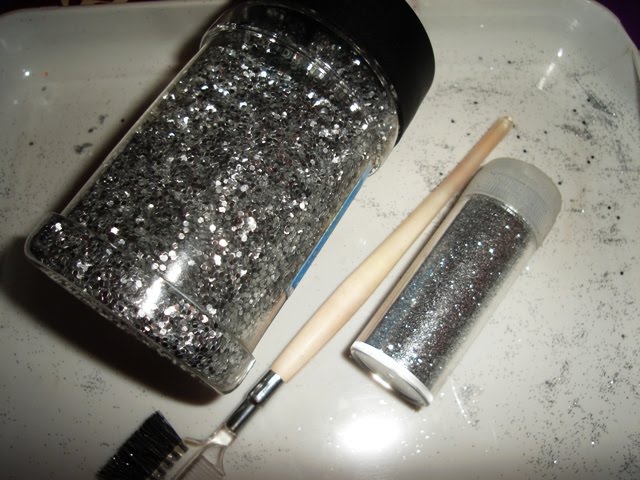
I go to my supply cupboard and bring out my chipboard alphabet box, some glitter and gems.
See the yellow and blue chipboard alphabet letters in the baggies - yup, I am going to alter one of those!


Oh - a quick note - its best if you have 2 sizes of glitter as the finer glitter will "fill in" the gaps left by the larger glitter. Don't forget your glittering tray!  Alright!


Now let's roll!


GLITTER UP! 
First cover your chipboard [or even paper] with a liguid glue and sprinkle liberally with the largest glitter. Press and tap off the excess ...
Now, switch to the finer glitter, and shake it all over your letter. 
Gently shake your letter to allow the glitter to fall into the cracks, and see if the edges are coated.
 You can always come back when everything is dry, add glue to bare spots, and repeat. 

ADD MORE PIZAZZ WITH GEMS
Now its time to add more depth, and interest to your letter. I am doing this with gems. 
So I use a pointed object like a push pin, and scrap away an area that is slightly smaller than the gem I wish to add, and add a small dab of glue, then push my gem into the spot and press it down.

This should allow your gem to snuggle in the surrounding glitter. A lot of the time, my glue squished up and out the sides of the gem - so I sprinkled more fine glitter over it - voila!

Repeat, adding gems till you are satisfied with your design. 


Its hard to photo the larger clear opalescent gems I've used, or the smaller coloured ones - but they are there! 

And finished, here is how it looks on my book, with a lil' bit of ribbon!
Later on, I will be adding a ton more stuff, but its good for a quick craft project this morning :)


So there you go - you can easily transform one object into something else!  You could paint them, glue fabric on them - pretty much anything!
So if you even spot some alphabets or something - really cheap - and they may not be what you want exactly, just remember - you can ALTER them!  
Have fun! 


- LEARN CRAFT IDEAS - 


20 April 2010

Altered Objects II - Milk Crate

Hello-hello!

LOOK - another project around the home....this time, I re-dressed a milk carton!  I love it now!  In its "former" life, it was packaging for a set of scented home products from William Sonoma. And I loved it for awhile, but when I was finished with it (it had Christmas all over it!!) ...I thought it was too good to toss.  So I tucked it away for a rainy day.

Then in the first days of the weather turning warmer, I found it and decided it would be a nice addition to my kitchen or hallway. But in a new suit, so to speak.


TRACE THE ORIGINAL - CUT OUT A PATTERN
If you find something similar, in order to re-dress the surface, it's best to 'pick apart' the original.
a) Make a template.
And if you would like a template to make another, then this is the time to trace the whole thing - which I did - onto a large piece of poster card ($1 store!). Then I cut the template pattern out with scissors, and a hobby knife for interior slots.
b) Cut your new Cardstock /Paper
Using your new template, trace the outline onto the back side of the 12x12 in. cardstock/paper.  Do all sections.  Gently trace any interior sections that need to be cut out with a hobby knife - careful, to not tear your paper!
Now - you have your traced outline transferred to your cardstock/papers....cut away!
[ I always take my time on this step because I don't want my scissors to cut away too much....now its time to glue!]

RE-ASSEMBLE your original - because now its time to re-cover it.

ALTERING THE SURFACE
c) Re-cover the object

I use plain old white glue! (gasp!)  It's true, but you could use your own method - like adhesive spray - or even tape the entire outline [be careful to get all areas that might buckle if they are not secured down].
Anyways, I apply lines of white glue and then scrape it down (like washing the windows!) ...so I only leave a thin film of glue ...

...then line up the cardstock/paper to the old milk crate (your project) ...and working from the middle of each section, press and slide your hand to smooth out the cardstock/paper to the object's surface outward in all directions.  Starting in the middle assures that you will not slide the paper to one side, and helps to prevent buckles.   [Depending on your method, check to see how everything is working out in the first 5 mins. Sometimes, a piece is buckled up, so you should smooth it down ---a little coaxing! ]

d) Embellish
I used some lovely ribbon sent to me by a friend - such a nice green! Love the embroidered flowers!  And to really add a 'punch' - I used one of Stampin' Up!'s fabric flowers and a nifty silver brad!
VOILA!!!

Now by recycling, I have a nice beautiful, FRESH looking addition to my hallway. I used it to hold flowers for Easter.  I am waiting to recycle some frappachino bottles - the ones shaped like little milk bottles? They may hold some small embellishments - more storage! Won't that look great!

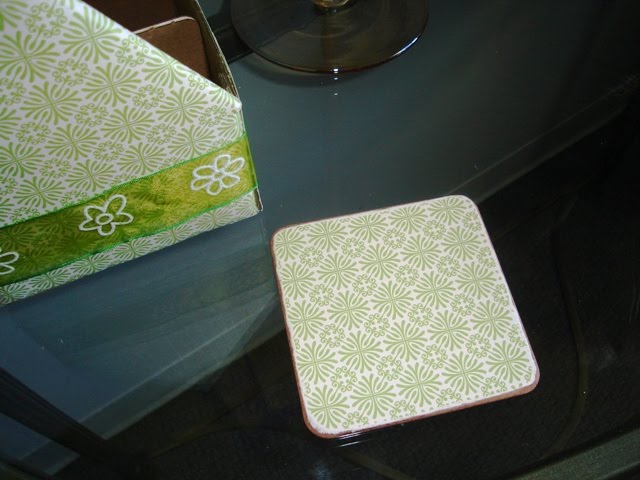
I am also working on matching coasters!  :)


SO GO AHEAD - RECYCLE SOMETHING!!!

- LEARN CRAFT IDEAS -

bye for now! 

20 March 2010

Altered Objects I - Children's Book

Hello fellow crafters!   Today I wanted to share a project I am currently working on. And its a recyclable one! Double points, lol :)

 One day I found a thick, stubby children's book at a second-hand sale - and it occurred to me to alter it. It had a different shape to it along with a few pages that slide open to reveal hidden sections - perfect!

 It's been in the 'making' for quite awhile. Basically I am doing work on it in stages. There was the 'preparation' stage which included giving the 'glossy' pages a slight sanding (regular household sandpaper) in order for me to adhere paper to it. This also meant sliding the hidden sections open & prepping those as well.

While the majority of the book has been covered in paper, one half of a page was covered with white paper and that in turn was painted. Regular metallic craft paint - looks great.

So this is what I am sharing with you today, Stage 2 - the book has been completely re-covered.  My plans for Stage 3 - is for it to be absolutely covered in bling and ribbons galore! LOL - its probably gonna cost me but hey, what is the point of a hobby if you do not indulge once in awhile! :)

However for Stage 3, I am  creating my own "embellishments" to some extent.  I have started by using my Butterfly die and altering those - and they resemble the expensive "Grand Adhesion Embellishments" made by K & Co. - if I do say so myself!   It's very creative!  You can just dream up and play with ideas till you find ones you really like!!

Here it is in pictures .... beginning the sanding...


Here pages are being covered...I purposefully using papers that do not match in pattern but are in blue-green colours...


Here I've added an origami heart my daughter gave me long ago and a tiny flower stem given to me by another lady years ago. Opening the sliding section gives me some journaling areas! I de-constructed the page, learned how it was working, covered the sections and put it back together using a brad for more stability.


Pages are thick so I am colouring the edges with markers.


This is the painted paper - its actually a metallic green, looks golden. The page beside them has nice embossed glossy pattern - so I added a small strip of sugar cardstock (pale blue) over the painted section - to tie the two pages together.


Here I am beginning the 'bling'!!!!  See the butterfly - its one I've made.


I started to cut out another butterfly shape to create a stained glass effect......lots of work with the hobby knife!


Then made its opposite by using the cut-out pieces! I hand cut out "body" shapes, doubled them and folded the top layer upwards for dimension. It's totally fun to just play this way! Nothing is the 'right' way - it's what-ever strikes your imagination at the time....then add more bling!  Bling makes everything look great.
My supporting layer behind the stained glass butterfly is a butterfly made from white paper that I coloured with ink using a brayer to blend the 3 colours.


Close-up


Here is the close-up which shows the body section, as I mentioned, its double-layered, folded outward and 2 pearls for antennas!


And another ....told you, its fun!  I even tried cutting a butterfly from a large faux leaf, and from jean fabric - but those are for another day.....


Now here they are on a page that I inked up in two colours, and then began to stamp butterflies in no particular order, then......


......I added words randomly, in a white craft ink! This page will hold more photo's with mats in white most likely, so it will really look nice ....and some bling of course!


So here it is - Stage One completed.  I have purchased a wee bit of bling to start as you saw - but that is nothing to what this will eventually have. Ribbons too!  Transparencies to layer over photos....the sky is the limit!  

I'll show the finished project one day!

Its a great project that:  a) takes time which is good for having an ongoing, larger project; and b)is great for using up paper - or buying paper in a pack or kit or one sheet at a time - which in itself is fun!; and c) its a recyclable method of using those books you might otherwise tossed - or you can ask your neighbor or friend for their old books!; d) its a wonderful creative exercise!  And finally - you will have a unique album that no one else will see in stores, one you can be proud of after your work is completed - when 'you' feel its completed, and I hope I've inspired one of you to give it a try!   

Template by: