


I am back today with a project I worked on for almost 2 days - but that's because I was designing it as I went along - so you could do it in about an hour if you had instructions, etc. I will be offering instructions for this once I make a PDF file - so look for it!
OK. I love this!

I started by making a folding card - well, more importantly, I started because I wanted to use some of the fantastic new things that have been accumulating around the studio! I have also been wanting to do some of the 'vintage' style that is exploding all around the world!
So - a folding card which ended up looking pretty much how you see the middle section and the two wings.
And while I was staring at it, the wings wide open - it struck me that I should turn it into a TRAY!
Then, a tray that could be useful around our cluttered home - I always can use catch-alls to threw my rings onto, spare change or to keep some perfumes - anything really!
I created a template for a tray - which basically is following the shape of the center & sides, deciding how far the front of the tray should extend, and creating "FLAPS" to secure the tray to the vertical sides. The front of the tray has a lip - a flap that folds up and over itself. And that was it.
Then I had another inspiration - I wanted a smaller container to catch little things - pennies, rings, who knows! So I grabbed some velvet ribbon and made a flower and a leaf and attached them to a golden coloured votive candle holder. Some gems and a pearl - its so cute, I think I'll make more of them!
OK - here the pictures!

The small velvet flower on votive candleholder!
.JPG)
.JPG)
.....used as a spot to drop my rings in!

Die-cuts, stamping (the shadow stamping on the brown) ...

Securing the sides with paper twist turned 'decorative'...and a close-up
of the tray's front 'lip' - which is also stamped, inked.....

The interior of the tray is stamped in a monochromatic matching shade....

and to protect the tray's bottom from damage, I cut a vellum cover - which I stamped on its 'reverse' side
using white CRAFT ink - because of the smoothness of the vellum's surface (warning - let it dry first!)...
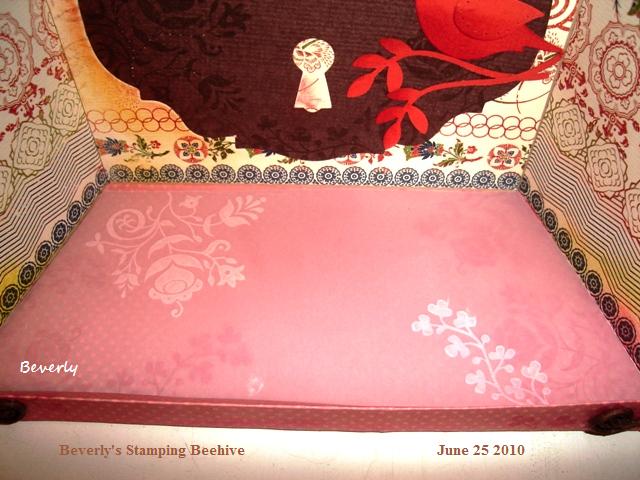
...vellum cover in place, and because I stamped on its underside, those white floral images
will not be harmed either! Gotta think of these things, right?

Close-up of the flower I made using 3 layers of flowers in descending size and a white brad
to tie in with the background colour of that delicious exotic paper!
I made a border pulling out some of the 'orange' of the paper, and to make the top as interesting as the
rest of the piece, I used some SCALLOP punches and tucked them in behind the scallop border.....
So here it is again! It's strong It's pretty
and it's my new favourite!
Hope you enjoyed it!

0 comments:
Post a Comment