Showing posts with label CARDS - Christmas. Show all posts

22 December 2012

Christmas Shadow Box Card

*Merry Christmas Crafters &  Friends - New and Old 
Welcome to my blog!  


If you're here to see the fabulous project that is featured in my Youtube Video " Christmas Shadow Box Card " I will just add a few pointers and information to help any of you - YOU MUST TRY ONE OF THESE! 


Watch Laura Cline's Tutorial Video below at the end of this post.

My Christmas Shadow Box Card.....


*Here is the beginnings where I took a kraft blank of the basic card structure and I covered it with some designer paper....I made a second one in Very Vanilla since I thought it would be better to create two right away, and after Christmas I will come back and finish the second one in a whole other style!


*Now I have created the "accordian-pleated" Shadow Frame.....


....and I have gilded the interior fold edges with metallic gold paint.


*I have added my backing paper to the Shadow Frame....it is very pretty paper which cannot be captured properly here as the circles have delicate glittery edges....so pretty. 


.....smooched edges with FROST Smooch, and added bling, and you can see that the Greeting from Christmas Lodge Stamp Set has also been embossed using the same embossing powder/glitter mix I mention in the video....


*I am keeping the palette in frosty metallics with some blue to counter all the natural tones and the flowers add just a dash of red!  But I used a metallic pen to add an accent here and there such as the Star - but then afterwards I added tiny rhinestones to the star....you can't help but glitter this project up! You can't!


SUPPLIES
Stampin' Up!
Five Petal Flower Punch
Cardstock: Espresso, Baja Breeze, Cherry Cobler, Very Vanilla
Frost Smooch
Clear Rhinestones
Versamark Pad

Other ...
Tim Holtz Distressing Powder in Weathered Wood
Ranger's Clear Embossing Powder
Martha Stewart Silver Glitter
My Mind's Eye Christmas 12x12 Cardstock Stack
Gold Metallic Paint
Variety Embellishments
***

CREDIT GOES TO:
my friend " The Country Rose" on SplitCoastStampers 
for the inspiration!
LAURA  CLINE'S  " SHADOW BOX CARD TUTORIAL"


THANKS FOR COMING BY!

11 December 2012

No Peeking Children's Handmade Christmas Card

Here is a really cute stamp set from Stampin' Up! called
 "No Peeking"! 
Here is the card I made with this set at Maria's stamp event in November...


Very sweet isn't it?  And I like the style of the greeting - so I think a child would LOVE a card like this!
But after searching the internet, I could see that crafters are having a field day with this stamp set - there were so many great projects out there - whew! Fabby stuff!
Here's a few that grabbed me from talented Stampin' Up Demos like

Click on their names to visit their respective blogs!

...tags galore!!! Excellent!

...just awwww! 


...great for twins!

... love the colours and layout!

This is what I luv-luv to see with a stamp set - real versatility and imaginative possibilities! 

Stampin' Up! No Peeking Stamp Set
wood mount #126290 $29.95 CDN
clear mount # 126292 $21.95 CDN

Now GO craft!  
*
  

25 November 2012

Maria's Annual Holiday Craft Event Nov 17


 Just one of the many cards we created. 
This features SU!'s new Snow Flurry Bigz Die


*Hellooooo!

Boy am I tired - but happy!!!   I now have several really nice HOLIDAY CARDS ready to go and I didn't even have to think them up!  Thanks to Maria's 2nd Annual Holiday Craft Event in Peterborough!  Yessiree...I attended as a guest and had a fab time - THANKS MARIA!!!

Keep your eye out for Maria's event next year if you're in her area [Kawartha Lakes] and you'll have a lovely time and come away with great cards!  And maybe win some prizes!

We also had a pot-luck lunch since it was an all-day event and I enjoyed all the nice dishes the women brought, and I enjoyed meeting them as well - very nice ladies who all made the event feel cozy and friendly!   

Maria and her friend Jane keep well-organized and help you when you need it, and Maria brings along some nice items to purchase {bring along a little spending money! its worth it :) }.....Jane has a little funny streak and made me laugh a few times!!!  We especially had a little fun at Maria's expense because Maria has the most worn-out stamp scrubber we've ever seen!  Maria - it's time to pony up, lol!  Maria's a good sport - she has to be to put up with us...."Maria?".... every few minutes, ha ha.  
 **
VISIT Maria's blog  " CRAFTY MARIA'S STAMPING WORLD" for more great ideas. 

All the supplies can be found in Stampin' Up!'s Holiday Catalogue :)  

 Here are more of the very lovely selection of cards we made....lots of layers, fun punches and accents to add....and the day just swam by we were so absorbed by the process!  

Looking forward to next year Maria!
** 

11 January 2012

Stampin' Up!'s Apothecary Art and Labels to " Die " for!

OMG! This card will convince you of the beautiful results you'll reap when you apply a little creative thinking!


An apparently talented SU Demonstrator, Ann Schach, transformed a floral stamp set which was only released this Jan - yes, right now -  into a Holiday Greeting card!  
[How was that possible you ask - well, as a SU Demo she would have had the stamp set through a pre-order arrangement, which is how we demos can experiment and show you some examples.


The point is - that this opens up my eyes into how myself and customers can buy this ' Labels ' Die Set {nesting dies!!!!} and the beautiful 'Apothecary Art ' Occasions Mini Stamp Set ....and use them to make next years cards for christmas!  A normally spring/summer floral for a christmas card - that's being clever! 


And isn't this so pretty?  


I found this gem on the blog of Stampin' Up! Dianne Sisneros 
Her blog ' For the Love of Stamping ' is showcasing wonderful talent of herself and others! 
Go have a look! 

You can purchase the supplies for this project through our 
OCCASIONS MINI-CATALOGUE  2012

Supplies:
Apothecary Art Stamp Set = 125527 Clear; 125525 Wood Mount
Labels Collection Framelite Dies = 125598 

1 January 2012

A very special Christmas Card using Stampin' Up! Christmas Lodge Stamp

It's special because its for our "special" family friends, the Shillolo's who hail from northern Ontario!  To celebrate their northern home, I thought the CHRISTMAS LODGE STAMP SET was an excellent stamp to use for them!


I was also dying to try stamping with a duo of red ink and clear embossing powder!!!  I'd seen this on a card example and decided it was really a nice technique.


GATED CARD FOLD as my preferred choice because it allows me to use so many techniques, and I love the fact that they can remove the belly band - open the card and  the tree is revealed!  I really pained myself to add the teeny tiny bells in just the right way here, but I did say this was special, ha ha!


The card will have a micro fold to create depth and will require a bit of fussy packing into the envelope to secure it properly but I knew that going into this project, so I was prepared.


Now I'll just post the pictures to share - enjoy!


The tree in its glory! 


.....the bells strung with Bakers Twine...


...the Christmas Lodge Belly Band
Cardstock is Crumb Cake and Soft Suede plus Very Vanilla....


....the reveal!....


Red embossed tree with clear gem stones!  See how the red makes a lovely tree?  Who knew!  I stamped the tree and cut it out and used pop-dots to elevate it over the embossed background. 
A small amount of patience for such a large amount of friendship to send to friends!  


I am glad to report the card made it just fine! 

Christmas Lodge Card with gorgeous Very Vanilla Ribbon!

*Here are more of our Holiday Cards for 2011!  They were all a varied set - each made with the recipient in mind. I loved all of our Stamping Up! supplies this year and the only regret I have is that we didn't have as much time as we wished to make projects...time slipped up this year but it happens once in awhile, doesn't it?   And so it made the ones we did make all that more precious....so here we go....


I loved this ribbon from the moment I set my eyes on it - and now I wished  I had purchased more of it!  
However here is the card that features it - a card created for one of my daughter's Grandmothers! 


 It is meant to evoke a romantic look - and we chose to use a toile effect by using  red and vanilla as our main colours!


And to make a card worthy of someone special we resorted to take our time to make thisand  by ....a) to use romantic details such as the soft, rich velvet ribbon {it has tiny edge stitching!} and the delicate scalloped edge....b)  to add interesting details in our techniques - such as how the card is folded and the manner in which the ribbon is attached.  A little labour intensive, but worth every minute!  


We always take out all the stops when we create for the people closest to us right?


Christmas Lodge stamp set was our first choice but other stamp sets provided many other parts to this: the Merry & Type set provided the "Deck the Hall.." expression and the red border is from Vintage Vogue!  However, a retired set, was dusted off to provide the main scene: our sleighers!  This is an old favourite set of mine, and is called Sleigh Bells Ring - my, such a nice way to go to church with beautiful horses pulling you and ring, ring, ringing in the air!  How romantic is that! 


Well here it is, and the only difficulty stage really is the slotting of the ribbon. I do not have the punch that would of made this easier but a craft knife did wonders, lol albeit a bit of time! 


To cut ribbon slots you make tiny measured slots  so the thickness of the ribbon can be threaded through....then make others 1 inch apart and continue the width of your project.  I leave about 1/4 of an inch border on opposite ends of the card, and adhere the ribbon underneath so it 'disappears' , but you could 'wrap' the ends of the ribbon around the card's sides too. 

CLICK ON PICTURES TO SEE CLOSE UP! 

Thanks for stopping by! 
***

18 December 2011

Christmas Lane Cards


Hi!   Finally my camera cord was located - whew!   So here are some of my holiday cards.....these are some that were mailed out this last week!  They are from my Christmas Lane Kit from SU! {of course!} .....we made the basic layouts at Palooza this year in October, and all I had to do was add some additional details - sweet and fast!  

One thing I shall point out - the top card says 'Best Wishes' - reason I chose that is because the recipient does not celebrate Christmas, but, I am sending her a card just because I do and so I made the choice to use this particular sentiment as it could be for any time of the year as well!  So I am safe in preserving both of our approaches to the holidays :)   

I shall be back (as Arnie would say)....just came home tonight from last night's Holiday Party, so no more explanation needed, lol! 

12 November 2011

Holiday Handmade Cards from my Stampin' Up! Archives!

Crafternoons everyone!


Until I find the drat uploading cable for my camera - I thought hmmmm...I know!   I will REVIEW some of my all time fave Stampin' Up! cards and projects I have done in the past - hurray, problem temporarily solved - sweet!


SO here I go....remember, its the concept you can use and substitute the stamps with "current sets" {aha...} or you may have the stamps, as stamp sets shown will be retired by now from our catalogue, so okay, let's start with this one - a really cool folding GATE CARD!   I love - love how these cards can be more than a card, as they make wonderful displays on shelves, china cabinets, dining tables....wow :)


 Here's how it looks tucked into the envelope......a nice scene which was stamped with BASIC BLACK (waterproof) INK and then coloured with our Stampin Pastels Chalks and touched up with Stampin' Write Markers!


I trimmed the stamped image and glued it to the front of the folded card base and then CUT it along the center fold {or if that scares you, cut the image in half and align the cut edges to the fold - then glue them in place!}     Add more cut-out images of holly and berries for interest.   And of course, some ribbon!!!
Our NATURALs CARDSTOCK shown here in Naturals White perfectly adds to the  homey feeling! 

And here it is opened - ta da!

Ahhhh.....nice, yes?   Wouldn't you LOVE getting one - I sure would!


And of course, some magic - glitter!  Not only is glitter nice anyways BUT it will sparkle when holiday tree lights or candle glow will reflect off the glitter surface !!!  Magical! 
You could substitute our MICA FLAKES from our Holiday Mini Catalogue!  And we also carry the tiniest SILVER BELLS in our Holiday Mini - that would be just perfect on the sleigh or horses - or the ribbon knot!!!  

Silver GLITTER Cardstock [ a MUST-HAVEsee our HOLIDAY MINI Catalogue! Also available in Red! ] and Silver GLITTER around the edges really help to make this 'pop'!   My combination of three narrow RIBBON pieces knotted together adds more elegance to create a very special card for someone close to you [or maybe impress the boss? LOL!]

Alright hope you enjoyed today's glimpse into my archives!  

Off for today's errands - have a lovely week-end :)

ox Taylor


1 October 2011

World Card Making Day 2011

Well hellooooo!   A large craft event  I had planned on attending today was cancelled last minute - and its too bad for all different reasons, as I could of had a World Card Making Class after all - better luck next year! So I put my new found time to making a more elaborate card  for today!!!


Here is my card featuring a bunch of techniques!

I went over to my Big Shot with some Whisper White cardstock, and using our Scallop Circle Bigz Die - I made the large circle and then embossed it with a snowflake Textured Embossing Folder. Next, I cut out the house - free style - with my craft knife!  To back the house, using our regular Wheel Handle I rolled some musical notes onto kraft paper using Early Espresso Ink... and  used the left-over scraps for the crimped corners! Next I punched out in glittery red and white, a couple of  hearts using 2 separate Heart punches. 
Naturally I distressed the edges of the scalloped circle - first with a smidge of blue ink, followed by the brown ink. Now - to pull it together!

I decided a band behind the scallop circle would 'ground' it better onto the card face!  So I made a bit of a complicated border band!  First I cut a wide band of Whisper White cardstock - about 3 x 8-1/2 inches and  using a border punch, punched out both sides of the banner - THEN - and this is where I had to make life a little difficult - I used our Scoring Tool and created a diagonal 'trellis' by scoring the paper and then "cutting " out the spaces inbetween - not all - but a fair amount of them! Whew!  But I am not done!
To give the card a boost of colour to balance all the red, white and natural kraft tones - I threw in a band of Marina Mist which I scored, and folded accordian style. That was pretty easy, and I glued it onto the red cardstock base making sure it stood nice and stiff because I want  it to support the scallop circle centerpiece  - creating some interesting depth!  Now that is a fair amount of techniques, wouldn't you say? 

So there you have it - a nicely done card for the holidays!  I did a card similar to this awhile ago - and so I just re-visited the theme with tiny adjustments.  That is always nice when you do not have to dream up a whole new idea - just re-work an oldie but a goodie!!!!   

NOW WHAT DID YOU DO TODAY FOR WORLD CARD MAKING DAY????  

8 September 2011

Holiday Cards for a Bingo Player!

This is sure to please a bingo player - and its fun to colour with Stampin' Up! Markers in the colors shown here or choose your own palate!  
The fun part with this card is that the BINGO part is a separate stamp - our BINGO CARD BACKGROUND STAMP and then you can stamp each individual square with any one of the co-ordinating teeny stamps from JOLLY BINGO BITS STAMP SET!   I mean it doesn't get more fun than that!  

The variety you will enjoy with both of these stamp sets is huge - you can alter the bingo background stamp and you have the bingo bits stamps to add a little decoration to an envelope - a border on stationary - tags - and all manner of projects!  Its great value! 

AND NOW THERE IS A HALLOWEEN BINGO BITS!  SPOOKY BINGO BITS!!


BINGO CARD BACKGROUND STAMP  # 120851

JOLLY BINGO BITS STAMP SET #120857

SPOOKY BINGO BITS STAMP SET # 123944

22 October 2010

Holiday Cards - Snowmen from JOLLY OLD ST. NICK by Stampin`Up!

What is a Christmas season without our Snowmen, right!

Well I have created this card from an example I spotted in our Stampin`Up! catalogue - and since I had seen the card at an early date, I decided to order all the elements to make this card.

You will need a Big Shot and the following materials:
   Cardstock = Baja Breeze  Crumb Cake (formerly Kraft)  Real Red
   Ink Pad & Markers - Early Espresso  Real Red or Red of any kind and White Ink
   Border Punch - I`ve used our latest from our Spring Mini Holiday, the
   Big Shot Die - Two Tags
                       - Textured Impressions Folder - I used 2 types for the background
  Stamps -  Greeting - Bright Christmas  and Snowman from  Jolly Old Saint Nick
   Glass Glitter - see new Mini-Holiday Catalogue - I`ve used `SILVER`
   Threads: crochet twist in red, vanilla, silver metallic thread
   and of course - adhesive, lol.


21 October 2010

Stampin`Up! Christmas Card using Jolly Bits and Jumble Alphabet

....plus a whole lot of other things!!!  His everyone....I have been a bit quiet on my blog but not so in my craftin`room! I`ve been a busy gal by steadfastly making christmas card after christmas card!  Not too shabby either - unlike my usual rush at the last minute - this year I am determined to be waaaay ready!

So here is one card for you to see...I will post my details on how to make this card once I get back home later today........

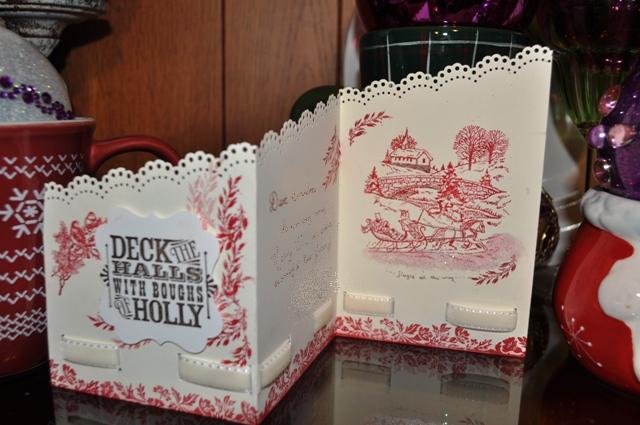
It`s my Vintage inspired Santa Claus card!  Hope you like it!


TECHNIQUE
First off....get yourself set up for making cards for the holidays....its less hassle if you have a sort of `system`approach even if  it`s organized in a temporary fashion such as putting everything away in a large box or pretty basket when your finished for the day. Have a nice box to put the finished cards into (along with `co-ordinating stamped` envelopes! 

Here I have my table set up for making this particular card...and you can see that I made several of each part as I go along which helps in making `multiple`cards for each design. 


OK let`s make this card!

Take a piece of Whisper White cardstock layer, 3 x 5 inches. Begin by rolling a background distress look with our jumbo handle and the TEXTURE jumbo roller wheel in a soft neutral such as Soft Sky.  A little bit of red is nice too.   
Then using Stampin`Up!`s alphabet letters `m-e-r-r-y c-h-r-i-s-t-m-a-s`, stamp them in 3 or 4 complimentary colours (here is Real Red, Old Olive, Early Espresso & retired Purely Pomegranate)
and in a sort of random fashion ....altho I managed to spell `Merry` and `Christmas` was stamped around the edge.  Don`t worry over this point, as a lot of it gets covered, but it should suggest the familiar greeting.


Now...fill in the outer spaces with images from JOLLY BITS - any of the images will do. You can use SU! small `A` size CLEAR BLOCK with the stamps - its a cute block, tiny but worth it!


Stamp a greeting such as ``MERRY`` which is from one of our latest greeting sets, BRIGHT CHRISTMAS and cut closely around the edges of the word. Do as many as you need. 

I have picked up these wonderful tiny ornate ``frames`` and stamped a small `S` for Santa. I used a template to  cut around it without having to measure out the exact size each time! Once cut, place the cardstock inside the frame. Voila - a lovely monogram charm!


More embellishment - using some scrap VELLUM, and a SNOWFLAKE stamp in a tiny size, I grabbed some WHISPER WHITE CRAFT INK and proceeded to stamp a bunch of times to create...


....this!  Now I have a lovely winter theme paper to use for my next item - a metal tag!


Cut away the vellum snowflake print with a template and a hobby knife and using Memory Maker`s Tag Tool


....I have these tiny tags - are they not cute!


OK - we are nearing the end!  Make SANTA by using STAMPIN`UP!`S new stamp set, JOLLY OLD SAINT NICK and stamp on Naturals White cardstock.  I not only stamped his image, but I coloured the image with a soft inking around the edges and features  in our newest brown ink, EARLY ESPRESSO, using a sponge. Cut around him with CRAFT SCISSORS.
Colour Accents: his hat I coloured with a marker in RED RIDING HOOD, and accented it with some RED GLITTER. Using our chalks, I blushed his cheeks and mouth.  Now, doesn`t he just look ol`fashioned! 
Nice :)
Again - make as many as you need. 


ASSEMBLE the parts A and B
Top Layer Assemblage - A
.....i) our Christmas alphabet-stamped cardstock is cut on one edge with my notecard punch ....
ii) string the metal snowflake tag and the monogram charm with some thread and attach to the above alphabet background cardstock - just below the top edge and to the center...
iii) now layer our Santa head over the background alphabet cardstock; by slightly over the snowflake tag, but below the monogram charm  (see pic - click for close-up)....
iv) now layer the greeting word, `Merry` over top of Santa`s beard, slightly off-center to the right.
* use some small bits of glue to keep everything layered nicely
Set aside and prepare cardstock base.

Cardstock Base - B
v) taking a 4:1-4 x 5:1-2 inch (A2 sized ) cardbase in chocolate cardstock, Early Espresso - roll with ink using the same TEXTURE roller wheel for the distressed look and make the fold at the top.

vi)...now take the alphabet-Santa head-tag`n`charm assemblage and glue securely to the cardstock base.

Finished. Yeah!

Hope you give this a try.

STAMPIN` UP! SUPPLIES
INK: Basic Black, Real Red, Early Espresso, Old Olive, Soft Sky, Purely Pomegrante
* Craft Whisper White Ink ( 101731)
MARKERS: Red Riding Hood
STAMPIN PASTELS (chalks)
CARDSTOCK: Early Espresso, Naturals White, Whisper White

TOOLS
JUMBO WHEEL HANDLE, 102661
CLEAR BLOCKS: A, C, F
BONE FOLDER,102300
HOBBY KNIFE, 102449
CRAFT SCISSORS,103179
STAMPING SPONGES, 101610

* FEATURED STAMPS * 
 Holiday Mini Catalogue:
JOLLY BITS, 121187 clear stamps
JOLLY OLD SAINT NICK, 121321 clear stamps
BRIGHT CHRISTMAS, 121318 clear stamp greeting

2010 Idea Book and Cataloque 2011:
JUMBLE ALPHABET, 115199 clear stamps 
TEXTURE, Jumbo Wheel 116685 
* any small snowflake stamp from a set, (Jolly Bits, Serene Snowflakes, Snow Swirled, etc)


Template by: