28 November 2010

Birdcage and Bird Holiday Cards

I created a Holiday 'WOW' Card Swap on Love is in the Details forum, and so here is what I considered to be my 'WOW' style!  I love birds and the bird cage is the icing on the cake!

I also just purchased a new wheel stamp which creates Music Notes - and I have been just dyin' to get something like that, so I used it to create the crimped paper along the bottom.

Here they are all together!  I have to make another for myself -  I always keep a sample one so I can include it with the cards I will receive from the others in the swap.  Don't they look pretty together?


Here is the crimped paper 'ribbon' I created using our new Music Notes wheel - I squished the ends up into a partial 'fan' at one end and embellished with a snowflake, and the other end was cropped with our Scallop Border Trim punch.   

I will come back [dead tired today from yesterday's craft fair!]...and provide more details on making this card ! :)   Now I am off soon to take my dog to have his Santa picture at the mall - they allow dogs and I guess pets, to come after the mall hours tonight - last chance, so I better go groom him a bit!

Bye!

24 November 2010

HAPPY BIRTHDAY ONE PAGE BINDING MINI ALBUM for a FRIEND, SOFIA!

HAPPY BIRTHDAY SOFIA !

I made this " One 12x12 Page Binding Mini-Album " for my online friend, Sofia and I had no idea till after I sent it - that it is her birthday today!  Whooo-hooo!  Hope you had a great day girl! [Sofia does crafts and gives lots 'n' lots of people a lot of nice gestures & gifts - she's a very generous soul! Glad we are pals, Sofia!]

Its a pretty cool project and like the title, you use a complete page of 12 x 12 cardstock, which when folded creates a 'fat' mini-album which counts as a 'page' because you can bind several together with the clever end section!

You can find the instructions FREE as I did, on YouTube from the fabulous Elsa  ( Hi Elsa! ) on her tubes, under JustafewDesgins  - scroll down to bottom of this post for the link to her tutorial for this project!


Not only is this an cool project, there is a ton of ways to decorate it and incorporate tags, photo's, etc.  And all from the neat folds!  The added bonus of the 'binding' element is great - you won't need anything special to create your own album - just some rings to connect the pages. 


So I can just show my pics and all I will say, is that I was trying to use some unconventional colours and patterns to make a holiday album. It was an experiment, and while yellow may not be the traditional colour I turn to for Christmas, it has just enough holiday-style elements to make you feel the vibe!  Least, I hope so!

I left sections open, and the front for Sofia to colour is she chooses....but you can add so many little 'gifts' tucked inside - even a Christmas Gift Card. I chose to help Sofia with some christmas tags. Or she can journal on them!

I will make my own project using this and am really looking forward to doing that!   OK! Cheers! xx  Beverly

 front

                                                                         Stampin' Up! Top Note Die & faux embossed metal technique                                                  

                                                                                               open up, and fold down sections with 2 pocket areas on each side

  fold down 'flaps' to reveal photo space, or more pockets!....

                                                                            create mini-envelope of ribbon tags to tuck into a pocket

                                                                          ...flip to the next section with more wide spaces for photos {used the negative space from my top-note die as a photo frame with one side open to slide a pic in); and with a pocket on opposite section! Do what you want really!

                                                                        
                                                                                                  side view of whole piece

  
....and moving to the last section....and a lovely fold-down flap pocket for a place to tuck a few things such as a tag, and a top note die-cut.........

 ...and we are back to the front! Ta Da!

Thanks to Elsa for the nice tutorial on YouTube and HERE is the project!

Supplies:
Stampin' Up!  Products = Top Note Die; Antique Brads, various Ribbons;
Stampin' Up! Cardstock = So Saffron Patterned Paper, Whisper White Cardstock
Stampin' Up! Inks = Craft Stampin' Spot - Old Olive, Classic Black, Classic Cherry Cobbler, Versamark Gold,


Teacher or Student Christmas Holiday Card

Hi everybody!

I am still working on my craft fair makes today - but I have time to share a quick post!


Some of us need teacher's or student cards - and I have here one I made the other day which is suitable for the elementary level of school ......


I found this Santa Head die at a sale - it used to belong to Jenni from Scrapbooking by Design - whose store has sadly shut down (but not their online store!)...and it was very well used, but that says a lot for Sizzix dies, because its perfectly functional!  I don't know if many of you out there have the original Sizzix's, but this one is red. I only normally know the ones I sell from Stampin' Up! which come in grey. 

Anyways, my point is that I ran Santa through my BIG SHOT and then I was sort of under-whelmed!  Yeah, I was....mmmm, not so much!  But then - I went to work on it!  I did the following....
SANTA
His HAT...
- coloured with chalk in REAL RED and glittered his hat with red glitter. 
 - the hat's trim was covered thickly with big chunky white glitter with a dash of STAMPIN UP 's GLASS GLITTER in SILVER.  I like the two glitters together!   

His BEARD...
- i) ran a piece of WHISPER WHITE paper first through an EMBOSSING FOLDER;
- ii) ran embossed paper back through with the SANTA HEAD DIE  to create a separate beard and TWO moustaches (add a second piece of scrap paper over moustache area to get 2 pieces).
- glittered the edges all around both pieces - very thickly to get a real sparkle!  
- paper pieced the white beard over his face and mounted the second moustache over Santa's face's first moustache with some foam mounts.

His FACE...
- cut and mounted a set of eyebrows in the Whisper White.
- coloured his face with chalks, blushed his cheeks, etc. 

.....................and all of a sudden, SANTA LOOKED GREAT!!!  So a boost was all the die needed IMO. 

The CARD
Card Base =  measures 5-1/2 x 7inches,  Top Fold, Pacific Point cardstock.
Top Layer Mat - cut and emboss a Whisper White cardstock, 5 x 6-1/2 inches and set aside. 

The PENCIL + TOP WHITE MAT
- using a new wood pencil - or a used wood pencil still with a very nice erasure - shave down the size of the pencil to within the size of the card's top layer mat. 
- cut a "thin strip of blue paper ribbon " about 4 inches long and cut the ends in a pleasing fashion;  roll tightly around the pencil and secure the two sections together with a small brad and place and push through the white top mat cardstock which was set aside,...
- now attach the white mat/pencil to the card's front, centering. 

FINAL STEPS
- layer a strip of Decorative Paper cardstock to the white mat, at about 2/3 rds down the front mat. I used red striped from our STAMPIN' UP'S CUTE CHRISTMAS DESIGNER PAPER
- create and mat some small sections of cardstock to create a background frame for a letter 'A' or 'A+' and attach to the right end of the decorative strip.
- attach SANTA with foam mounts (Stampin' Up's Stampin" Dimensionals)

AS A FUN THING for a young person....I used our JEWELLERY TAG PUNCH to make a little more of a statement on the back of the card, you know, we usually stamp "hand-made by....so'n'so", right?  Well, I thought IF you are a little person giving this to your teacher, wouldn't it be nice to acknowledge their action of choosing the card?  I thought a very young student would love this part, as they can 'write' their name down on the last tag which is why I left it empty!  

                                                                                 [giver can 'sign' back of card]


ok - so much for a quick post, lol! 

Hope you enjoyed this! Ta!


PS - if anyone wants a die cut of this Santa Head - just email me! 


22 November 2010

Christian Class Cards

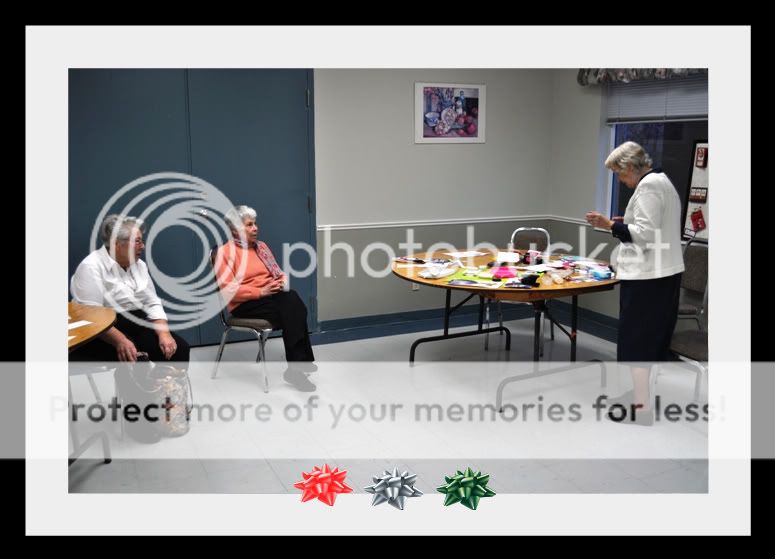
It was a real pleasure to welcome some lovely ladies from Glen Ayre Church to one of my classes!  I'd like to give a special and warm welcome to Elinore, Ruth, Louella and Carol!  Here they are minus Ruth who had left when I realized I needed pictures!


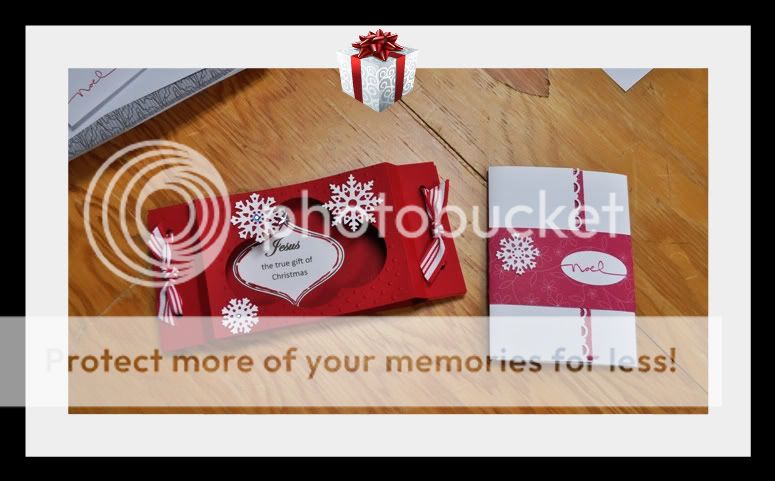
Our theme was holiday card projects with a Christian emphasis; and to achieve this, for our first card  I made a greeting framed by the shape of an ornament  using the program,Paint. This greeting exclaimed "Jesus, the true gift of Christmas".   For this project, we used a diorama card in Real Red cardstock. We also used a striped ribbon also in Real Red and White which framed the card nicely.  I love diorama cards because they really look impressive!

Our second card project featured a gate-fold style card held with a belly band.  I printed a poem created by M S Lowndes - which you can download for free at her website with her permission and of course, give her credit! Hi Ms Lowndes!

The poem was turned into a tag and placed in a pocket in the center section, and then flanked by DP either side. A few ornate touches and you have a lovely, lovely card to give someone special!


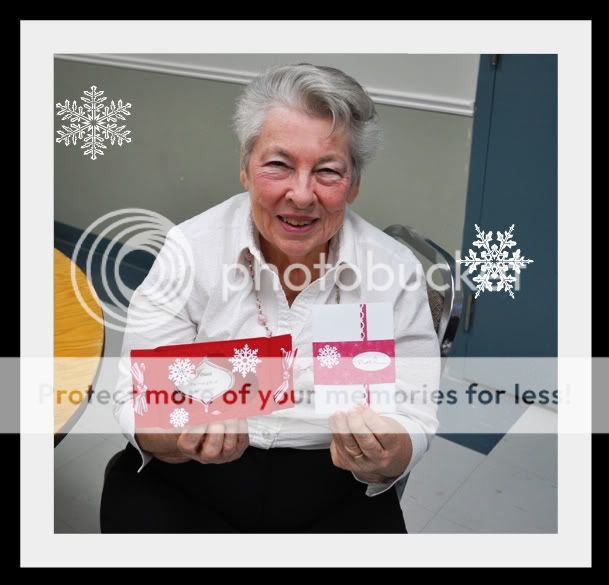
Here's a close-up of Elinore with her cards....

For a few of the ladies, it was a new experience and I am proud to say they did sooooo very well!
We have a great afternoon, and I am looking forward to my CHOCOLATES and CARDS!  I hope more new ladies come as I find it delightful introducing this hobby to more and more people - its rewarding to see a person enjoy a particular technique, and see their excited over thier card !

Darn, I forgot to take a photo of my darling dog yesterday - our regular craft fair, the Canadian - German fair was here the week-end (which means I enjoy pretzels!) and of course I dressed my dog in his red sparkly bow as I walked him around!  He has such a forgiving personality, lol!

Till my next post,
bye for now!

16 November 2010

Reindeer Cards

Hi everyone,

I thought I might show off some of my 'reindeer' cards!  I have a few stamps involving reindeer as a new one comes along every year for my collection...and the one constant that I like, is their antlers!  Reindeers also are a wonderful way to introduce the colour brown into the mix!

So here are a few of my examples:


This card (above) is one where I made - yes, MADE my own stamp - the birch bark trees!  I merely drew two styles of tree trunks on a double thickness of foam [like the kind in kids crafts], CUT them out...applied some repositionable glue to one side of each, and then stamped with them like I would with any other stamp!
Foam actually works pretty good - it has a nice smooth yet absorbant surface for the ink and transfers the ink to your paper or fabric, etc. very well too!   Reason I made one is that I did not have a tree trunk like I envisioned for this card.
After stamping the trees in WHITE CRAFT INK, I stamped my 2 different stamps of reindeer onto a separate paper and cut them out using good, sharp scissors like our Stampin' Up! Craft Scissors.

The dark, smaller deer in the back represents the 'Doe' and I cut her 'antlers' off.  I also "cut" her in half, removing a tiny piece out of the middle section, and then placed the two remaining sections on either side of a tree trunk - so she appears to be "behind" a tree in the background. { {TIP: you need to cut a piece of the mid section out or else, just separating the two parts on either side of the tree would appear visually incorrect}.

The 'Stag' was cut with his antlers off too, but this time I "stamped" his antlers onto the card front, then using dimensional foam dots, and aligned him with his stamped antlers - but not before adding a 'wreath' around his neck! [same thing - stamp and cut out a wreath]....

So I really, really like the results!  I may do some more additions to this card - perhaps an accent to make it pop even more - like some glitter snow!!!


Now here are a pair of cards my daughter and I made.  I think its a very nice card considering you use only the natural paper and shades of brown! But it is the "variety" of browns and natural whites that works!!!  And of course, that is our wide striped grosgrain ribbon from Stampin' Up! that everyone loves - so that really helps [they have many colour choices too!]. You could add an nice antique brad accent or even a hint of  '   red ' to adorn these cards further.  Also - its just one rubberstamp of one deer - which we stamped 3 times in a row!  
This would also make a nice card for a Grandfather, Father, Son,....you know how we dwell on finding males a card!  LOL! 

Last but not least.....I DREW a card!   Yes I did!  I realized that I have not been 'artistic' enough lately - it is my first calling after all!  I went through years and years of fine art in school, art history in university and finally trained as an Art Conservator - - and I have drawn and painted for all of my life, and yet rubberstamping has taken over!  So, I must of been feeling nostalgic, and so I made a S-I-M-P-L-E  DRAWING!
I made a tiny sketch of a tree, and used circles as leaves. My "reindeer" is like the Scandinavian deers - very, very simple, like a 'stick' deer!  A bit of colour...but I wanted it to remain soft, so in no time, it was done!  The NATURAL cardstock from Stampin' Up! is also a big help to making the card feel hand-made. 


Well, I hoped you like my tour today - hopefully inspired you in more ways to be artful with your cards!
Beverly :)

STAMPIN' UP! SUPPLIES = Cardstock, Markers, White Craft Ink, Classic (dye) Inks, Punches, Ribbon, Glue, Pop Dots & Dimensionals. 


10 November 2010

New Class - Cards with a Christian Theme - Nov 21

Hello!

I an happy to announce that I will be able to hold another class this Nov 21rst - in preparation for the Holidays!    I am moving well ahead on my craft fair schedule, so hurray for me, I can do one more class!

NOV 21rst Christian Christmas Cards
This class will feature religious cards - the greeting will be religious in nature. The design of the cards will be pretty and we will do several cards plus a mystery project!!!!  I love to throw in a mystery project!

So come and join us -  Experienced or Beginners!      Cost =$ 20.00    Nov 21  1:00 - 1:30 Start time.
Please Contact Me to Reserve your spot - so I can have materials cut. Thank You.

* Receive $5 discount for bringing a friend plus your new friend also receives $5 discount, as well as Seniors and Students.

God Bless,
Beverly

Also - don't forget I have my last class of the season - CHOCOLATE AND CARDS, DEC 5TH 1:00

8 November 2010

Blog Under Development - Please Bear with Me! Plus Get Ideas + Gift Certificates Here!

Hi everyone!

I am developing my blog - finally - to better reflect what I always intended to do here in the first place. Sooo...not being a technical genius, I am relying on help and if things do not work properly at present - please have patience while we work on the kinks!


For any help with orders, or general questions - please just email me at bstampingbeehive@gmail.com and I will enthusiastically read your message and get back quick as I can to you!

I am very open to helping you with general craft ideas - so if you have craft questions - bring them to my attention and I will give you my best advice or direct you to someplace that will help you if I can not. No question is too small!

Need inspiration for the holidays - gift ideas?  Ask me for ideas!

Also consider giving a STAMPIN' UP!  GIFT CERTIFICATE in any denomination you'd like - I will help you to present it to your intended in a chic fashion - they will be delighted!

AND - If you want your fella to GET THE BIG HINT - I can send him a message with your suggested gift WISH LIST on your behalf!  How fab would that be!

take care friends,
Beverly

Template by: